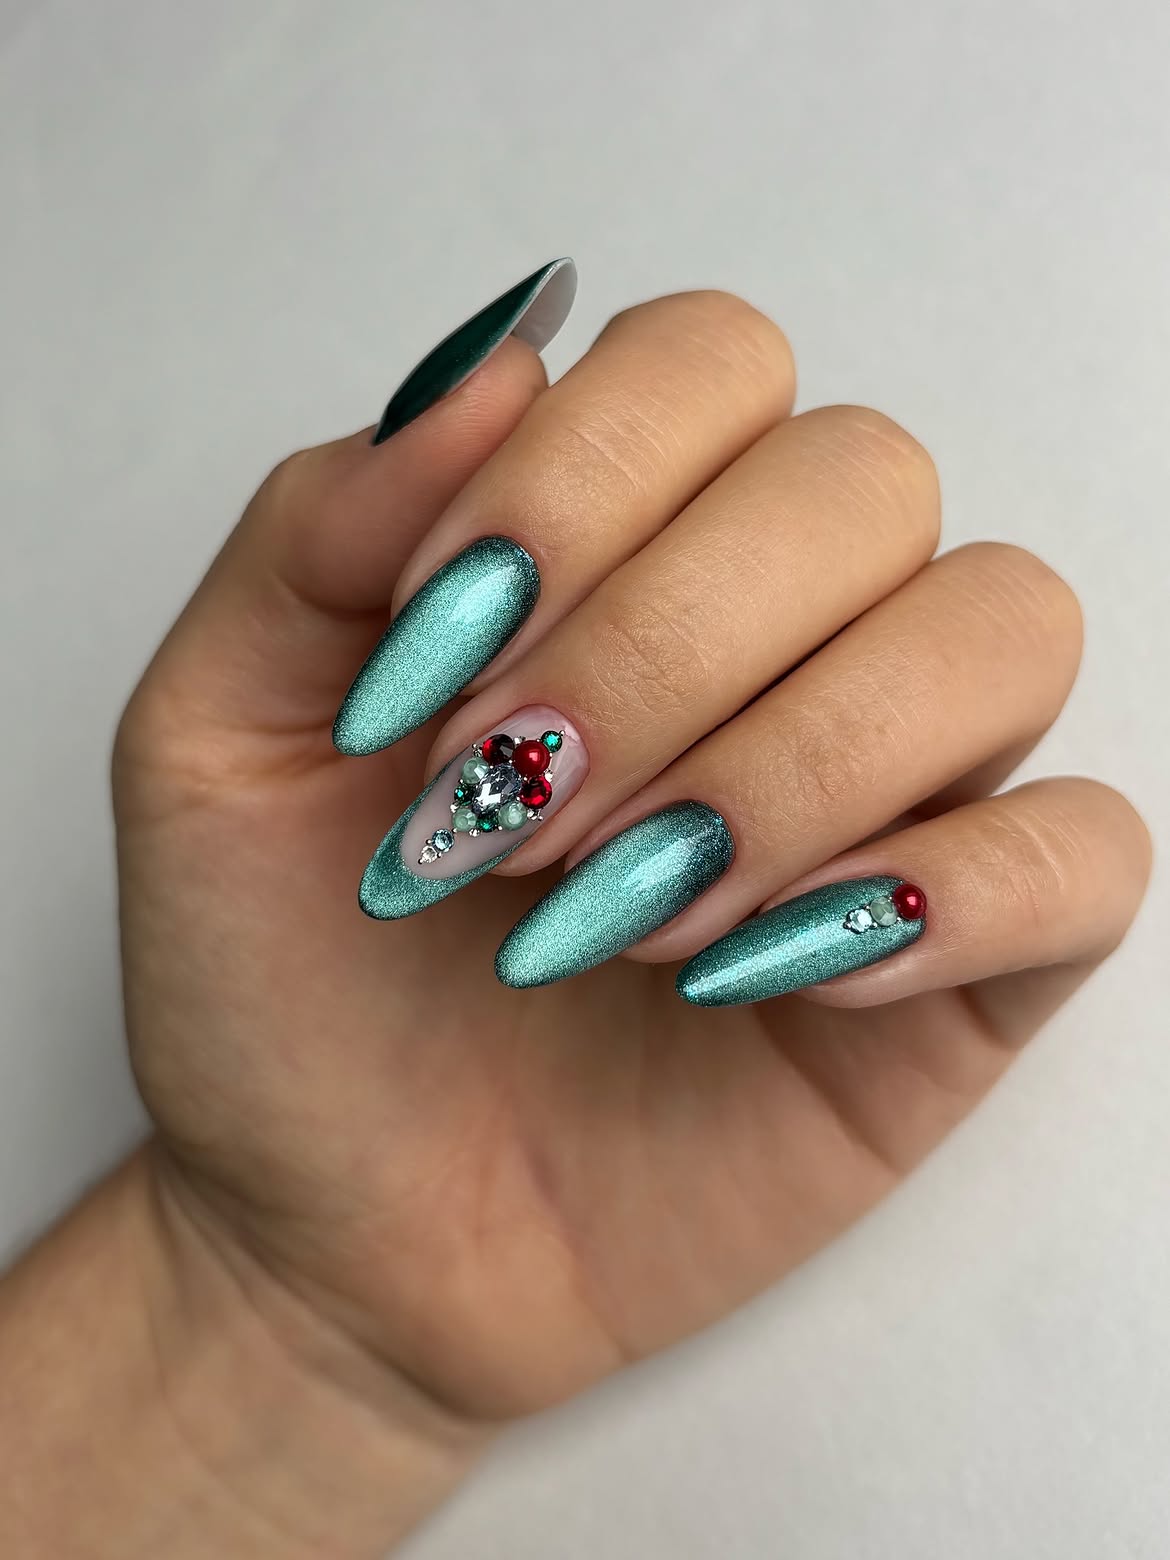
The holiday season is officially upon us, and what better way to kick off the festivities than with a dazzling manicure? December is the perfect time to embrace all things merry and bright, and your nails are a canvas waiting for some holiday magic.
From shimmering glitters to cozy knit textures and classic festive hues, there’s a design for every style this season. Get ready to explore 30 incredible nail ideas that will have you feeling festive and chic from your fingertips.
Whether you’re looking for subtle elegance or full-on holiday glam, you’ll find plenty of inspiration to make your nails sparkle and shine.
1. Festive Polka Dot Short Squoval Nails
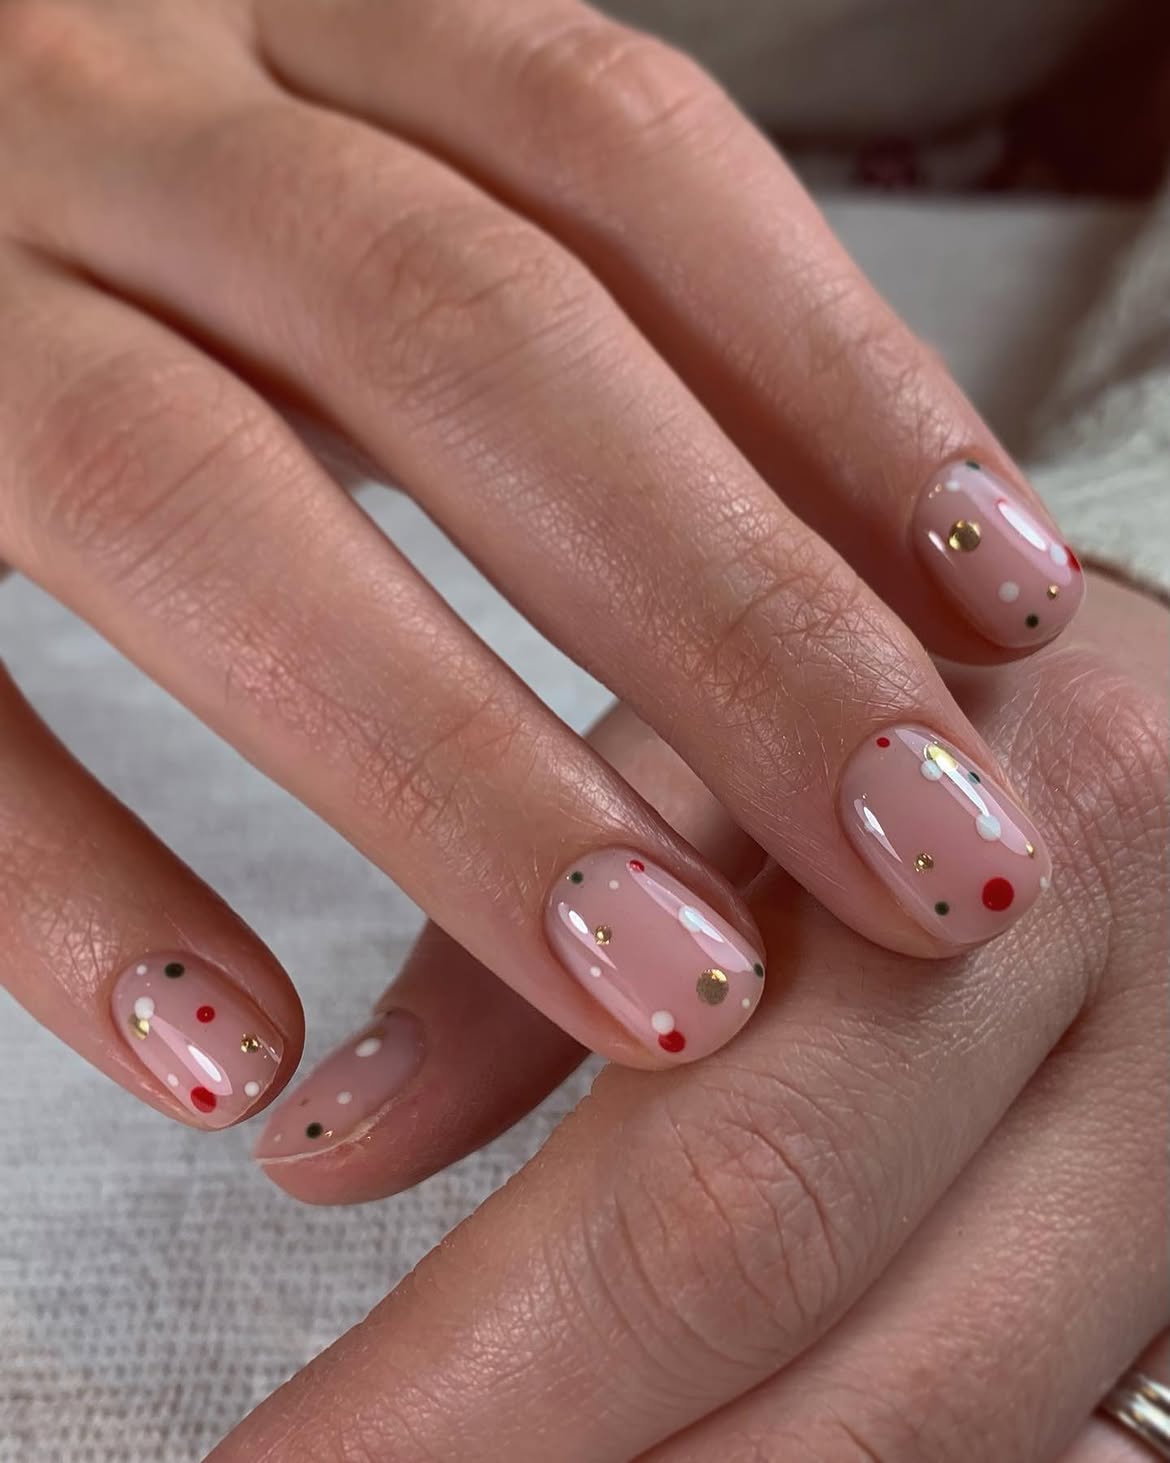
Embrace minimalist holiday chic with these adorable Festive Polka Dot Short Squoval Nails. This look features a sheer, milky pink base that provides a subtle, natural canvas, adorned with delicate, evenly spaced dots in festive colors like red and green. The short squoval shape keeps the design neat and practical, making it perfect for everyday wear while still radiating holiday cheer. It’s a fresh take on classic designs, offering a refined elegance that’s both playful and polished, ideal for those who prefer understated festive beauty.
Achieving this simple yet sophisticated look starts with meticulously prepping your nails to ensure a smooth, clean base. Apply one to two coats of a sheer milky pink polish, allowing each layer to dry completely. For the dots, use a dotting tool of various sizes and high-pigment polishes in your chosen festive shades. Dip the tool lightly and gently press onto the nail, ensuring even spacing. Seal your masterpiece with a high-gloss topcoat to enhance the vibrancy and extend wear. Consider contrasting dots for a fun twist, or keep it classic with just one color, perhaps a deep red or a shimmering gold.
2. Festive Christmas Nail Art Almond Holiday Manicure
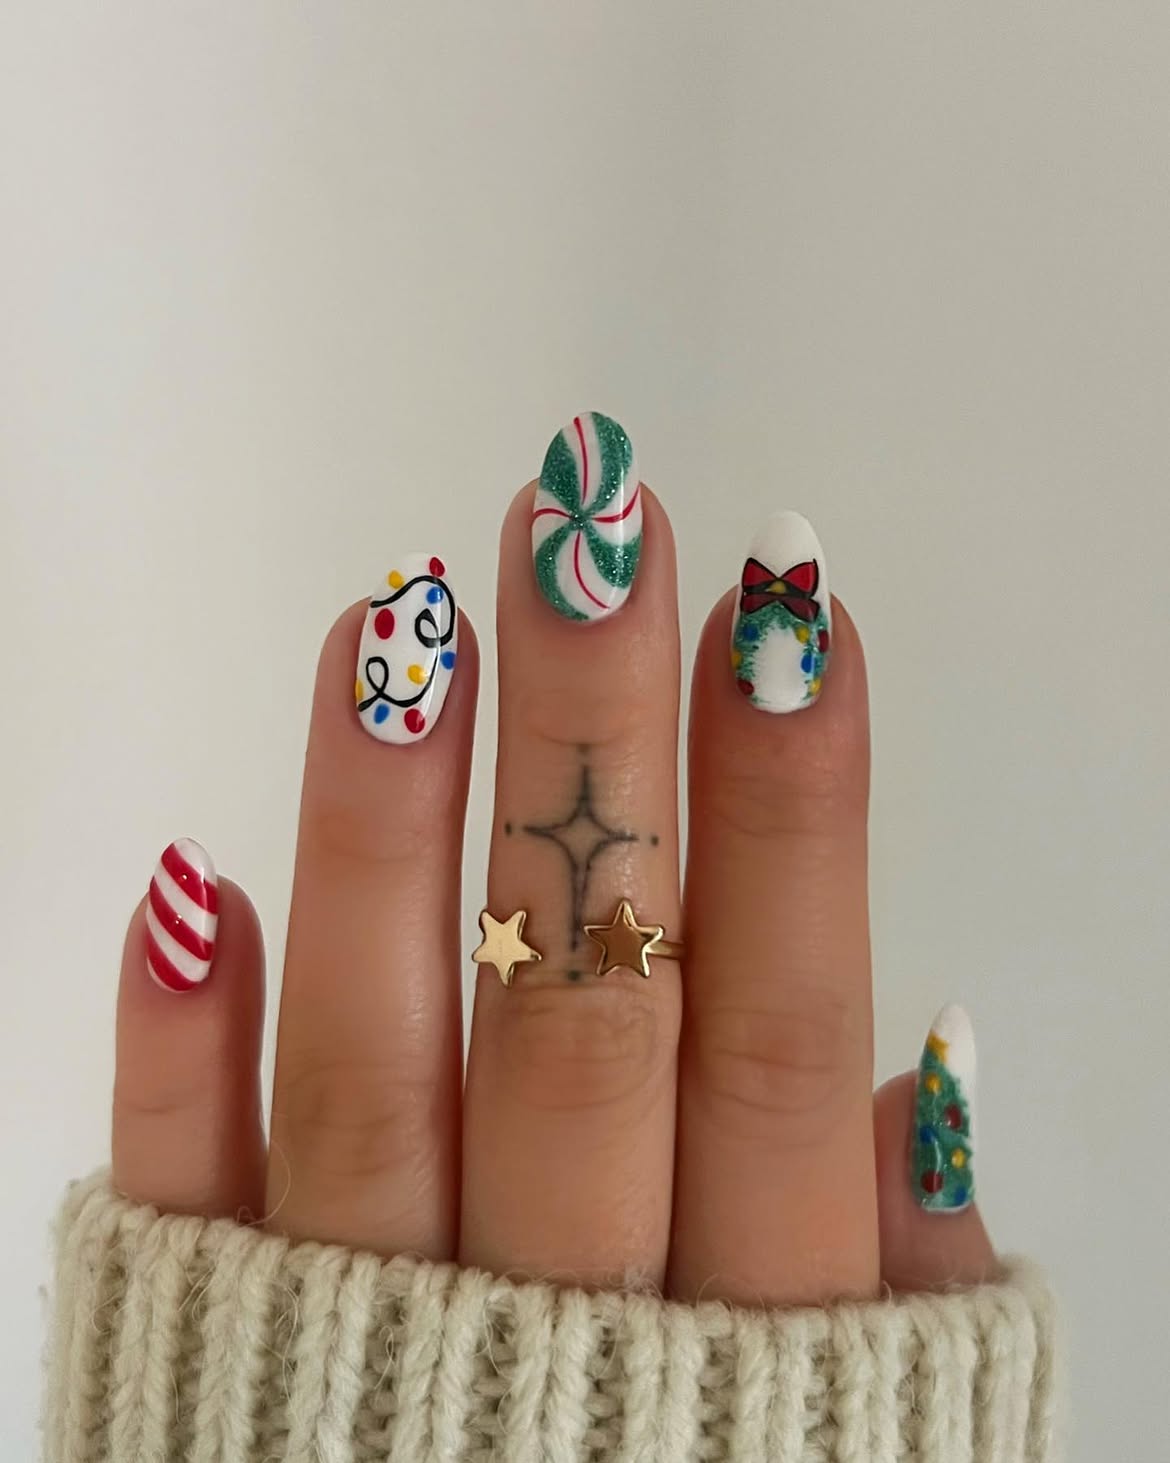
Step into the holiday spirit with a Festive Christmas Nail Art Almond Holiday Manicure that captures all the joy of the season. This intricate design often features hand-painted holiday motifs like candy canes, tiny gifts, or even snowflakes, creating a whimsical and personalized look. The elegant almond shape provides a sophisticated backdrop for these playful elements, making your nails a true conversation starter. It’s a perfect option for those who adore festive flair and want their hands to reflect the magic of December nails. The combination of classic red and green hues brings out the traditional spirit of Christmas.
To recreate this festive masterpiece, start with a solid base coat, perhaps in a classic holiday red or a sparkling white. For the intricate Christmas nail art, use fine-tipped brushes and highly pigmented gel polishes to hand-paint your chosen motifs. Practice on a nail art wheel first if you’re new to detailed work. Once your designs are perfect, cure each layer if using gel, and then seal everything with a durable high-shine topcoat. For an extra touch, you can add a touch of glitter on accent nails to make them truly pop, complementing the traditional colors.
3. Shimmering Glitter Ombre Snowflake Almond Nails
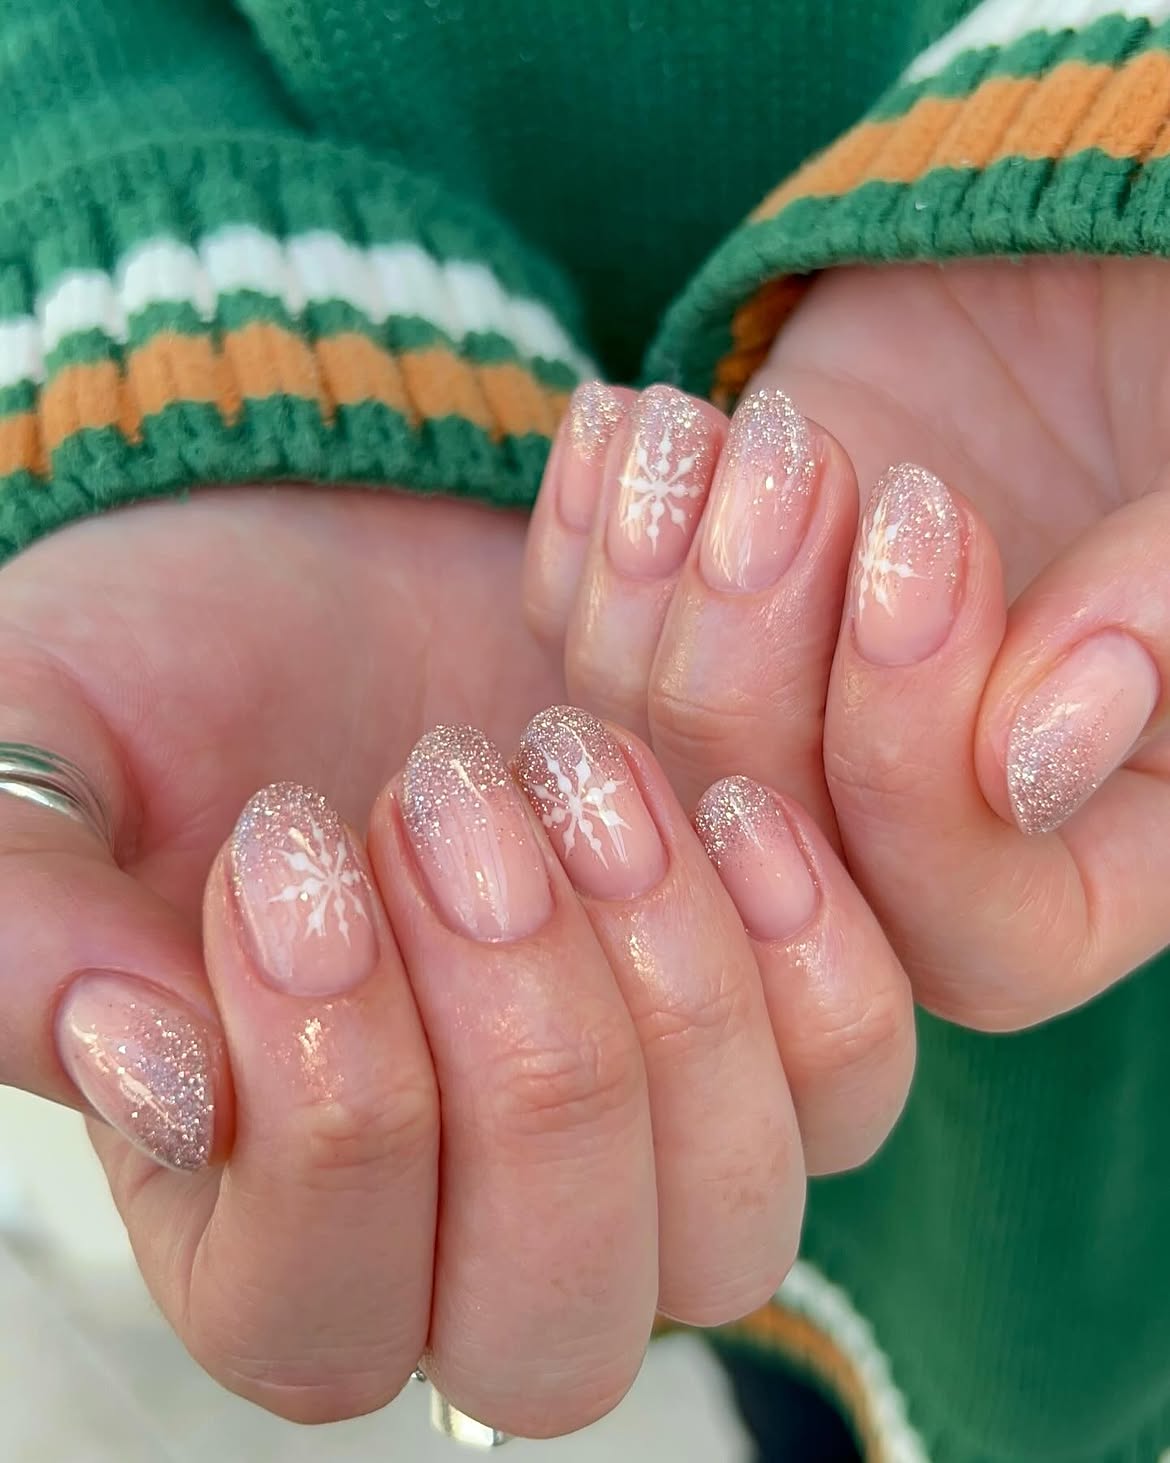
Embrace the enchanting beauty of winter with Shimmering Glitter Ombre Snowflake Almond Nails. This magical manicure features a gradient of fine glitter, transitioning seamlessly from a soft nude pink base to a dazzling, icy shimmer at the tips, reminiscent of freshly fallen snow. Delicate hand-painted snowflakes are strategically placed over the glitter, adding an artistic and festive touch. The elegant almond shape elongates the fingers, making this look both glamorous and sophisticated. It’s perfect for those seeking enchanting inspo, bringing a touch of frost and sparkle to their holiday ensemble with beautiful white and blue undertones.
To achieve this ethereal look, begin with a sheer nude pink base on prepped almond-shaped nails. Apply a fine silver or iridescent glitter polish, using a sponge or brush to create a smooth ombre effect that concentrates the glitter towards the tips. For the snowflakes, use a fine-tipped nail art brush and white polish, gently painting intricate patterns on a few accent nails. You can add tiny rhinestones to the center of some snowflakes for extra sparkle. Finish with a high-gloss topcoat to seal in the shimmer and protect your detailed design, ensuring a long-lasting winter manicure.
4. Burgundy and Champagne Shimmer Bow Almond Nails
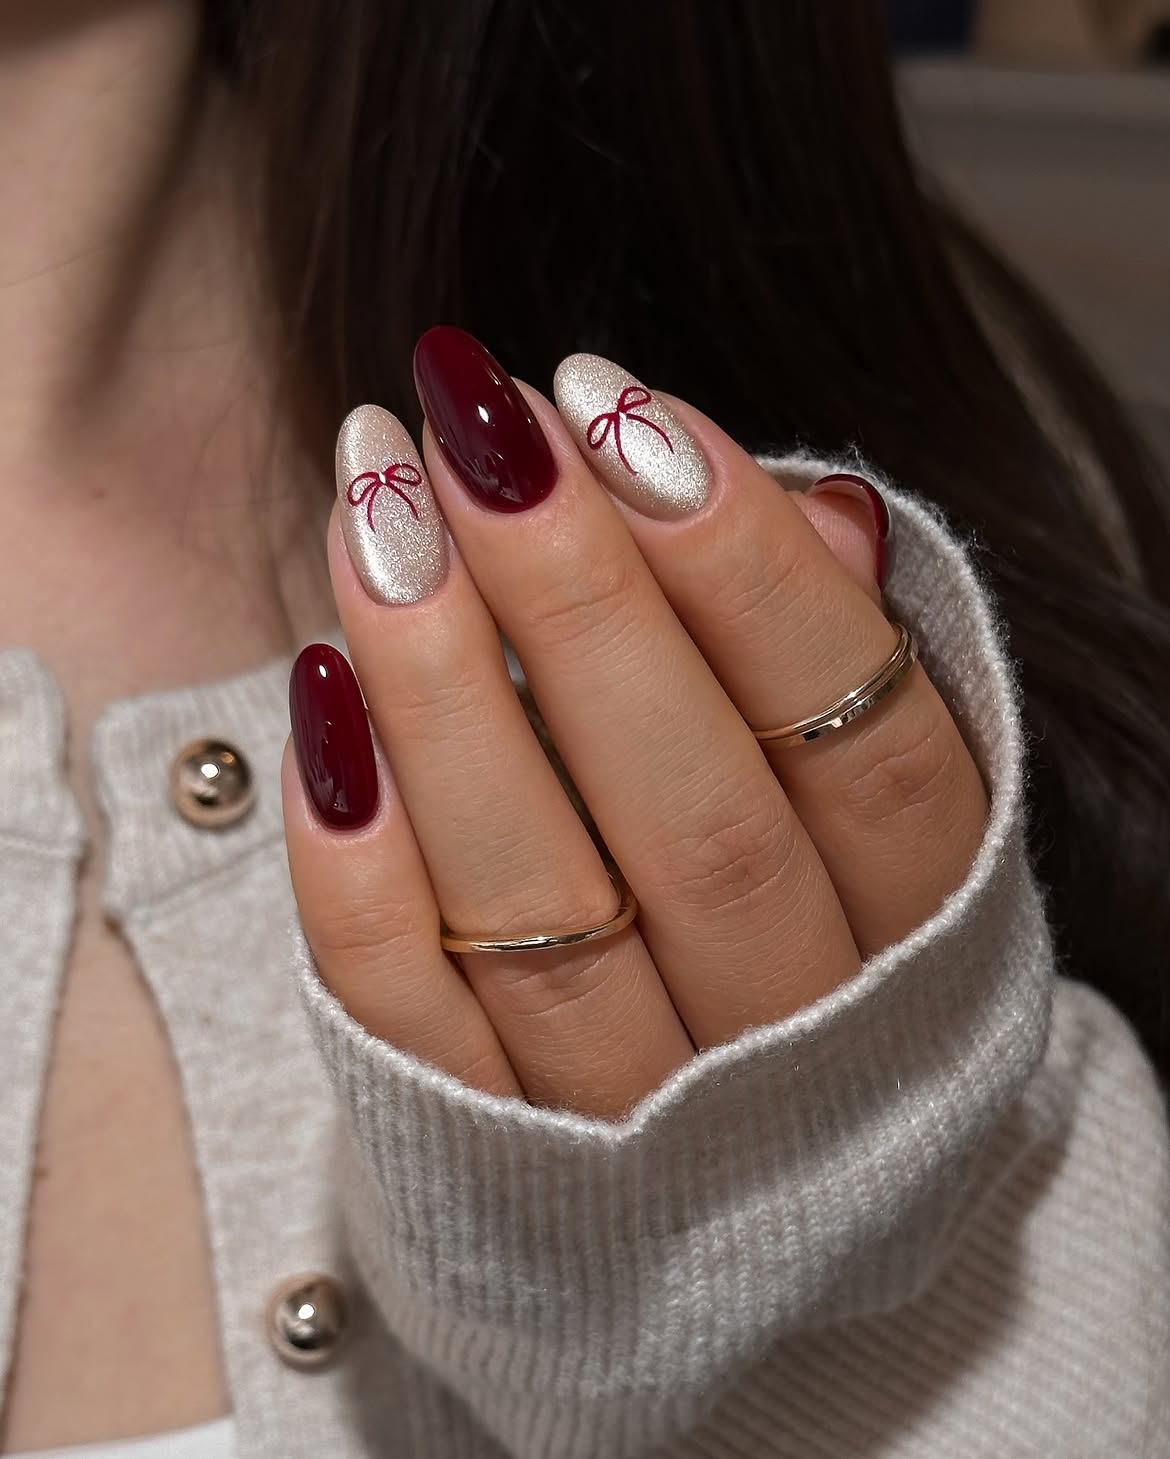
Unleash your inner coquette with these opulent Burgundy and Champagne Shimmer Bow Almond Nails, perfect for an elegant holiday statement. This luxurious manicure combines rich burgundy gel polish with a shimmering champagne cat-eye effect, creating a sophisticated depth. The hand-painted bows, often delicate and perfectly placed, add a charming and feminine touch, elevating the overall aesthetic. The sleek almond shape enhances the glamour, making these nails ideal for special occasions or when you want to feel extra chic. These designs are fantastic ideas to get an early start on your festive preparations, ensuring you’re ready for any holiday gathering.
Start by shaping your nails into a graceful almond silhouette and applying two coats of a deep burgundy gel polish. For the champagne shimmer, use a magnetic cat-eye polish over a designated accent nail, manipulating the shimmer with a magnet to create that captivating stripe effect. Use a very fine brush and a contrasting metallic polish, like gold or silver, to meticulously hand-paint the tiny bows on your desired nails. A clear topcoat will encapsulate and protect your intricate artwork, ensuring a long-lasting, high-gloss finish. This look pairs beautifully with formal wear and adds a refined touch.
5. Glossy Nude Nails With Hand Painted Christmas Wreath Tips
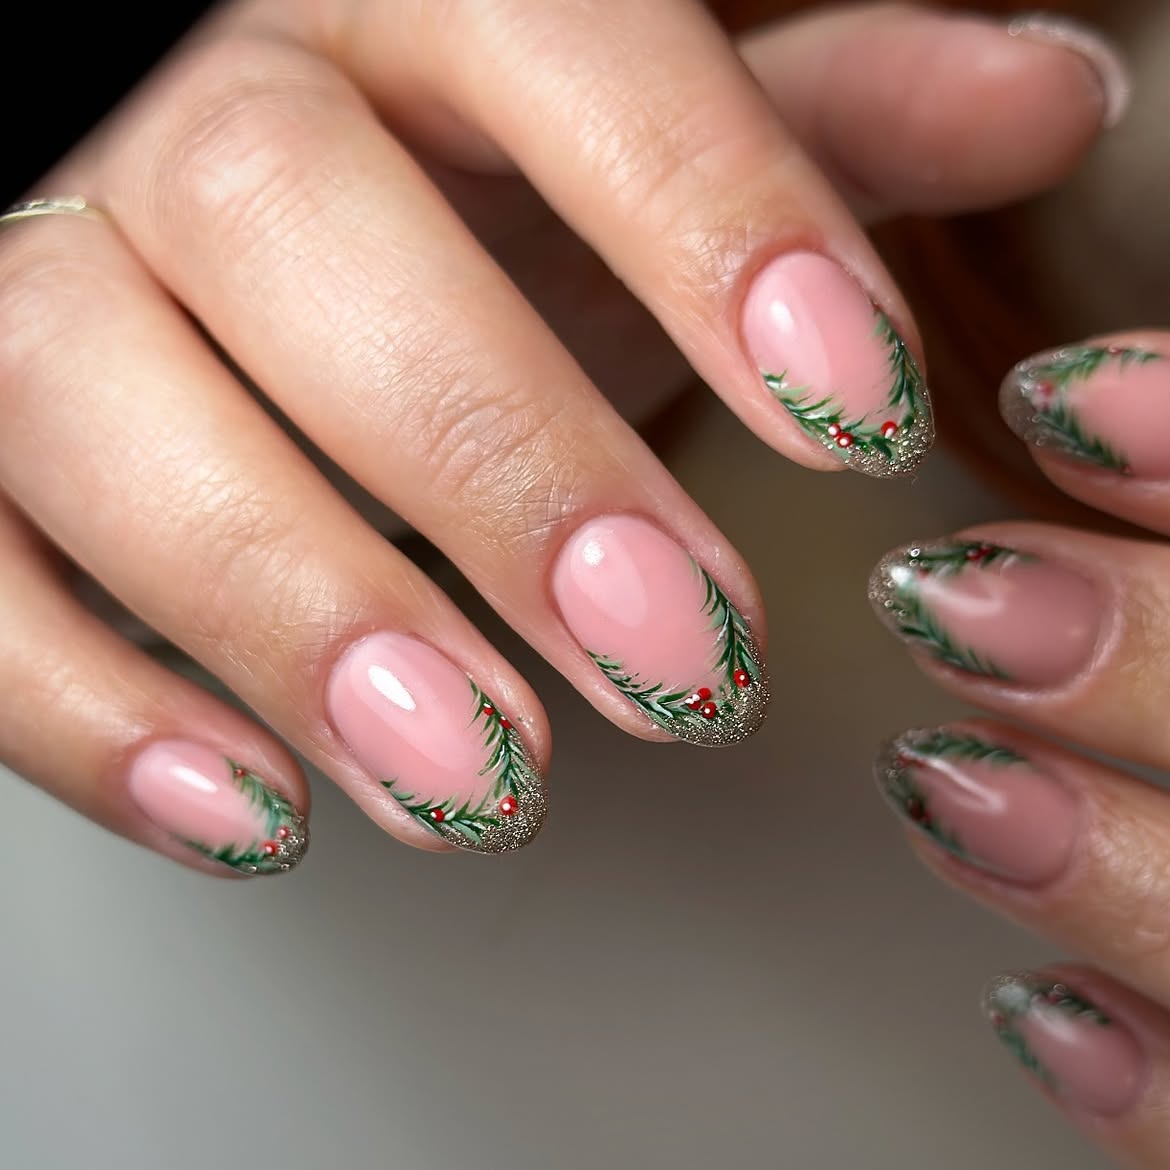
Channel sophisticated holiday charm with Glossy Nude Nails adorned with Hand Painted Christmas Wreath Tips. This elegant style features a clean, milky pink base that provides a chic and natural foundation. The magic happens at the tips, where delicate hand-painted Christmas wreaths, often with tiny red berries and green leaves, create a unique and artful French tip variation. A subtle touch of glitter often frames the wreath, adding a gentle sparkle without overwhelming the minimalist aesthetic. It’s an effortlessly simple yet stunning way to incorporate festive red and green into your look, perfect for those who appreciate refined holiday elegance.
Begin by ensuring your almond-shaped nails are perfectly prepped and apply a sheer milky pink polish for a clean base. Using a very fine detail brush, carefully hand-paint the circular wreath design on the tips of your nails with green polish, adding small dots of red for berries. For an extra festive touch, you can lightly dust a fine iridescent glitter over the fresh green polish before it dries, or carefully apply a thin line of glitter around the wreath. Seal the design with a high-shine topcoat to lock in your festive artwork and provide a durable, glossy finish that makes your nails truly stand out.
6. Glitter French Tips With 3D Winter Nail Art
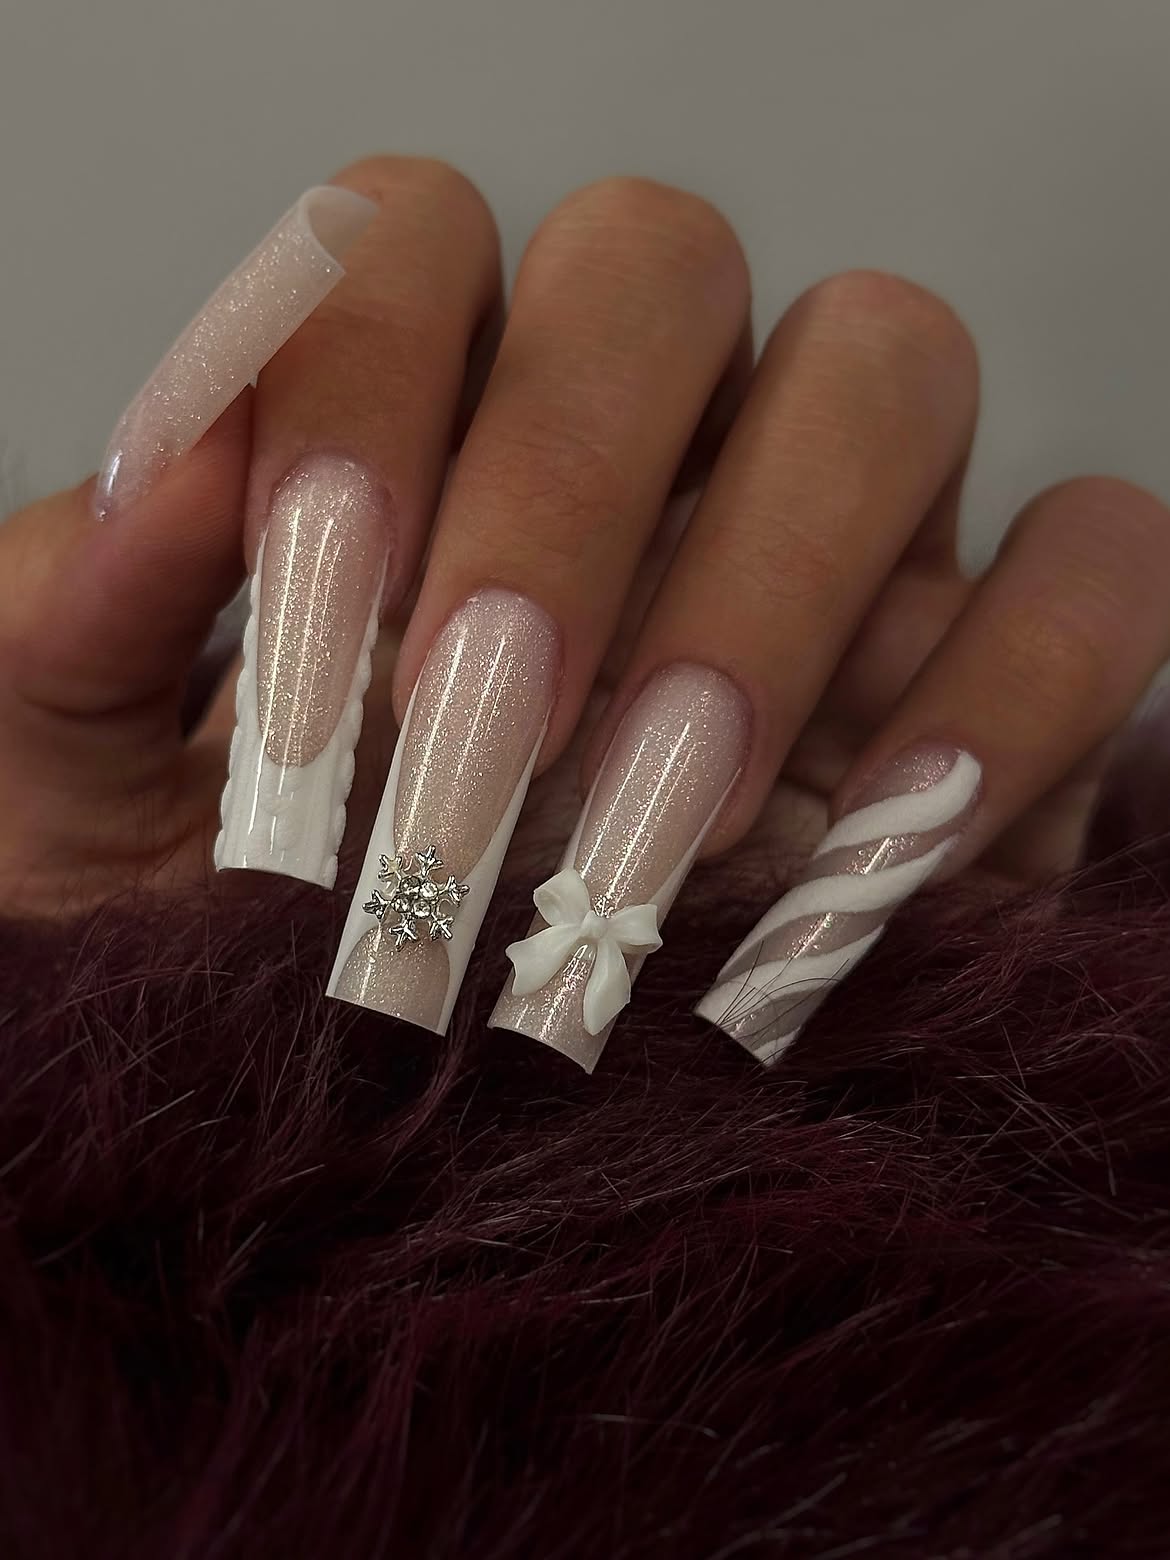
Step into a winter wonderland with these stunning Glitter French Tips featuring 3D Winter Nail Art. This glamorous design takes the classic French manicure to new heights by replacing the traditional white tip with a sparkling, iridescent glitter, often in shades of silver, white, or even icy blue. The real showstopper, however, is the intricate 3D winter nail art, which can include delicate bow charms, intricate snowflake rhinestones, or even subtle pearl accents. The coffin shape provides a chic and modern canvas, perfect for showcasing these detailed embellishments. This look offers fantastic ideas for adding an extra dimension of festive elegance to your holiday style.
Start by shaping your nails into a crisp coffin silhouette. Apply a nude or clear base coat, then carefully create your glitter French tips using a fine glitter polish or loose glitter applied with a brush, ensuring a clean, precise line. For the 3D elements, use nail art glue or a thick builder gel to secure tiny bow charms, snowflake rhinestones, or any other winter-themed embellishments you choose. Place them strategically for maximum impact, perhaps on an accent nail. Finish with a generous layer of gel topcoat around the 3D elements to ensure they stay put, making sure the entire nail is smooth and glossy, especially around the raised pieces.
7. Festive Reindeer And Sweater Knit Almond Nails
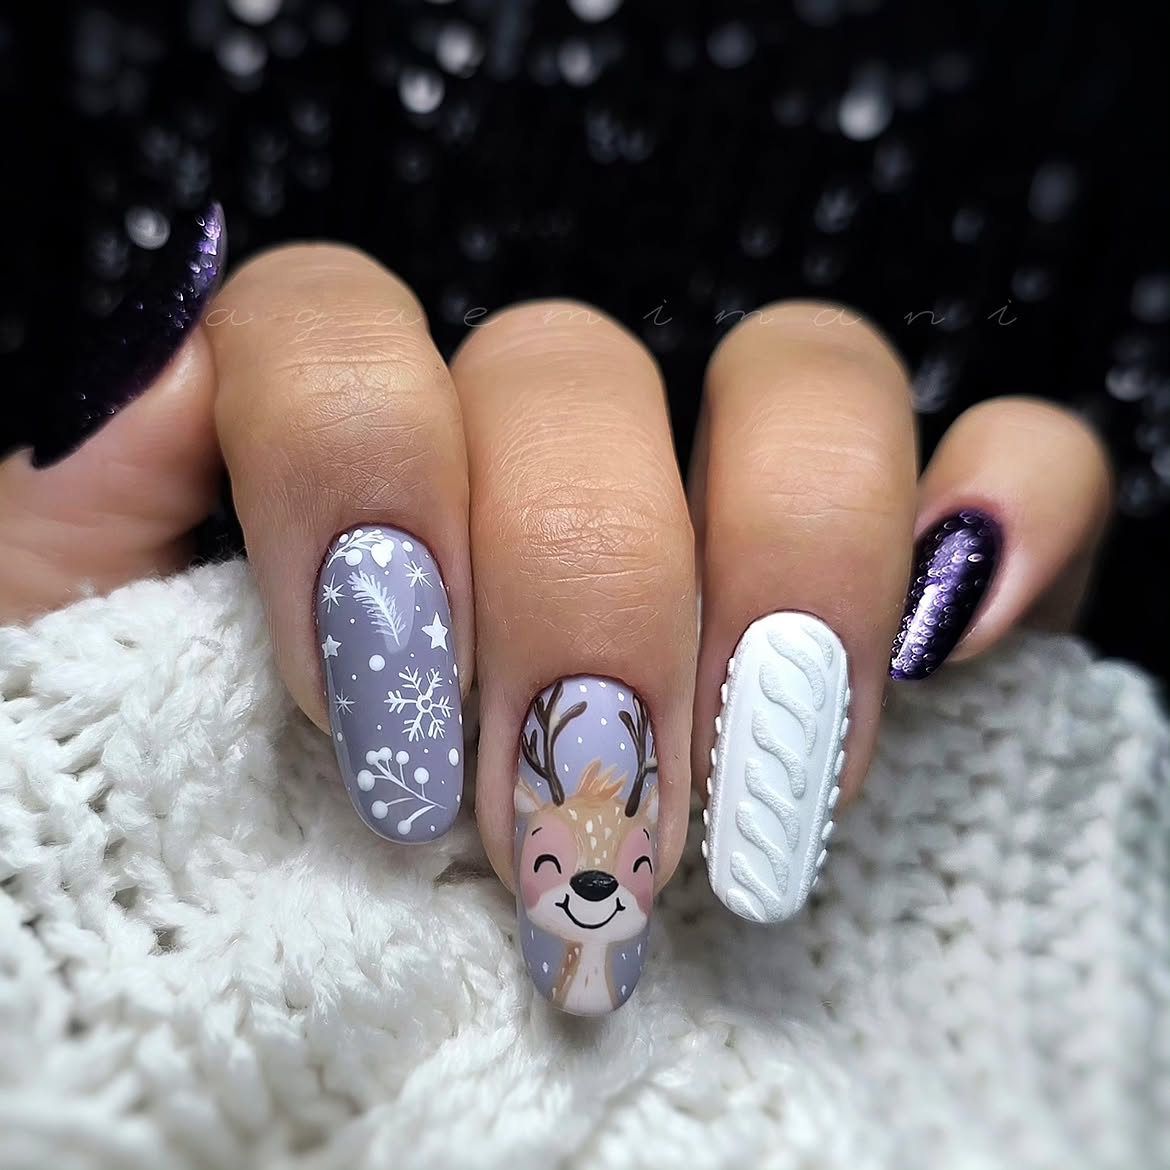
Get ready to cozy up with these Festive Reindeer And Sweater Knit Almond Nails, a charming blend of warmth and holiday glam. This design artfully combines playful hand-painted reindeer motifs with intricate 3D sweater knit patterns, creating a tactile and visually rich manicure. The addition of a shimmering purple cat-eye effect on accent nails adds a luxurious depth and a touch of unexpected sparkle, perfectly complementing the traditional holiday elements. The elegant almond shape brings sophistication to this whimsical look, making it a delightful inspo choice for your December nails. The interplay of green and red highlights the festive spirit.
To recreate this look, start with an almond-shaped foundation. Apply your base colors; a neutral for the reindeer and knit nails, and a deep purple for the cat-eye accent. For the 3D sweater knit, use a thicker builder gel to pipe on the desired pattern (like cables or chevrons), curing each section to build dimension. For the reindeer, use a fine brush to hand-paint the cute details. On the cat-eye nail, use a magnetic polish and magnet to create the signature shimmer effect. Finish with a high-gloss topcoat, ensuring a smooth seal over the knit texture, for a festive and durable manicure.
8. Festive Red And Green Almond Christmas Star Nails
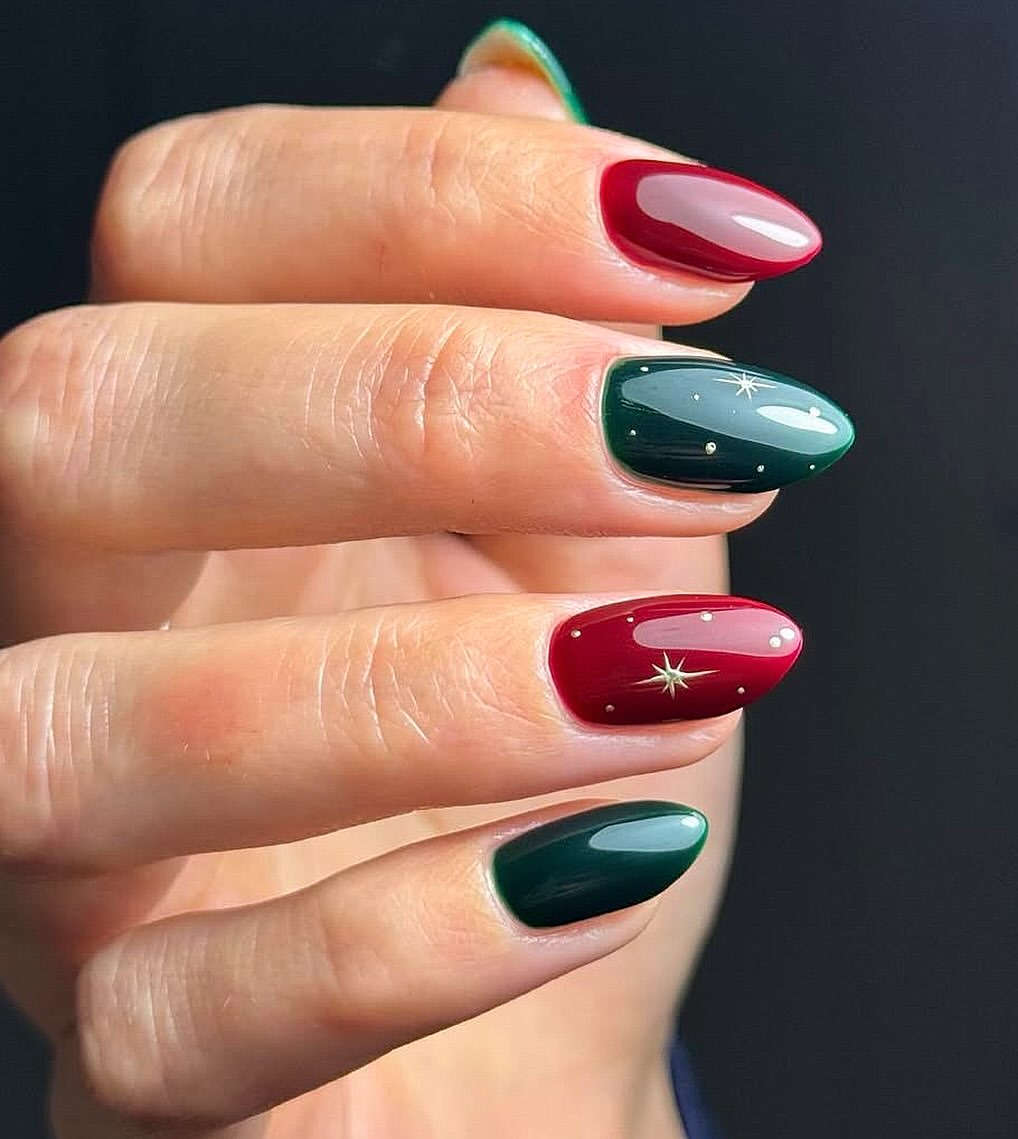
Celebrate the season with Festive Red And Green Almond Christmas Star Nails, a classic yet vibrant holiday manicure. This design features a rich combination of traditional Christmas red and deep hunter green polishes, often used in alternating patterns or as bases for festive accents. The star of the show (pun intended!) is the delicate gold star art, which can be hand-painted, stamped, or applied as decals, adding a touch of celestial sparkle. The sophisticated almond shape provides a beautiful canvas for these iconic holiday colors and motifs. It’s one of the most beloved designs for anyone wanting to fully embrace the holiday spirit with their nails.
Begin by shaping your nails into a perfect almond and applying alternating coats of a vibrant Christmas red and a deep hunter green gel polish. Ensure full, opaque coverage. For the gold star art, you have a few options: use a fine brush with gold metallic polish to hand-paint tiny stars, apply gold star nail decals for precision, or use a stamping plate with a star pattern for consistent results. Position the stars strategically for a balanced look. Finish with a high-gloss topcoat to magnify the festive colors and ensure your holiday nail art stays brilliant and chip-free throughout all your celebrations, perhaps even matching the festive colors of your other manicures like the ones with glitter tips!
9. Matte Pink Reindeer And Snowflake Square Nails
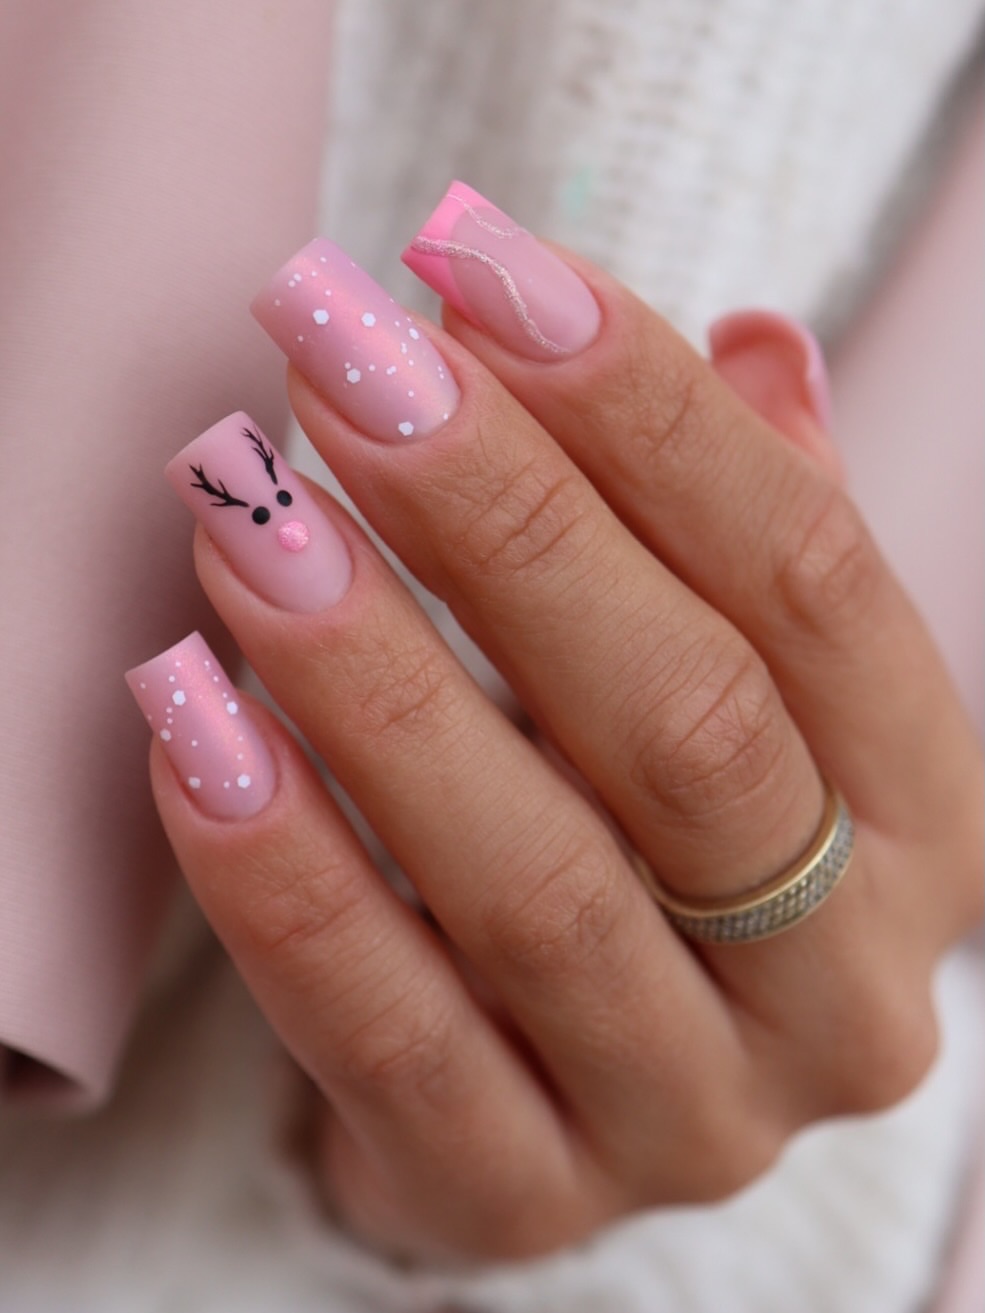
Discover a playful twist on holiday nails with Matte Pink Reindeer And Snowflake Square Nails. This charming manicure features a soft, matte pink base that offers a chic and understated backdrop for whimsical holiday motifs. Delightful reindeer and delicate snowflakes are artfully incorporated, often through hand-painting or decals, bringing a touch of winter magic to your fingertips. Subtle glitter accents add a hint of sparkle, perfectly complementing the matte finish without overpowering it. The classic square shape gives this design a clean, contemporary edge, making it an unexpectedly sweet choice for your November transition nails and a delightfully simple way to showcase cute short designs.
To achieve this adorable look, prep your square-shaped nails and apply two coats of a soft matte pink nail polish. Allow it to dry completely to maintain the matte effect. For the reindeer and snowflake art, use fine-tipped brushes with white or silver polish for precise details, or apply high-quality nail decals for an easier application. Strategically place small glitter accents, perhaps a tiny dot on a snowflake or a single line on the reindeer’s nose, using nail art glue if necessary. Finish with a matte topcoat to seal the design and preserve that velvety, non-glossy finish that makes this style so unique and eye-catching.
10. Burgundy Velvet Nails With Gold Celestial Stars
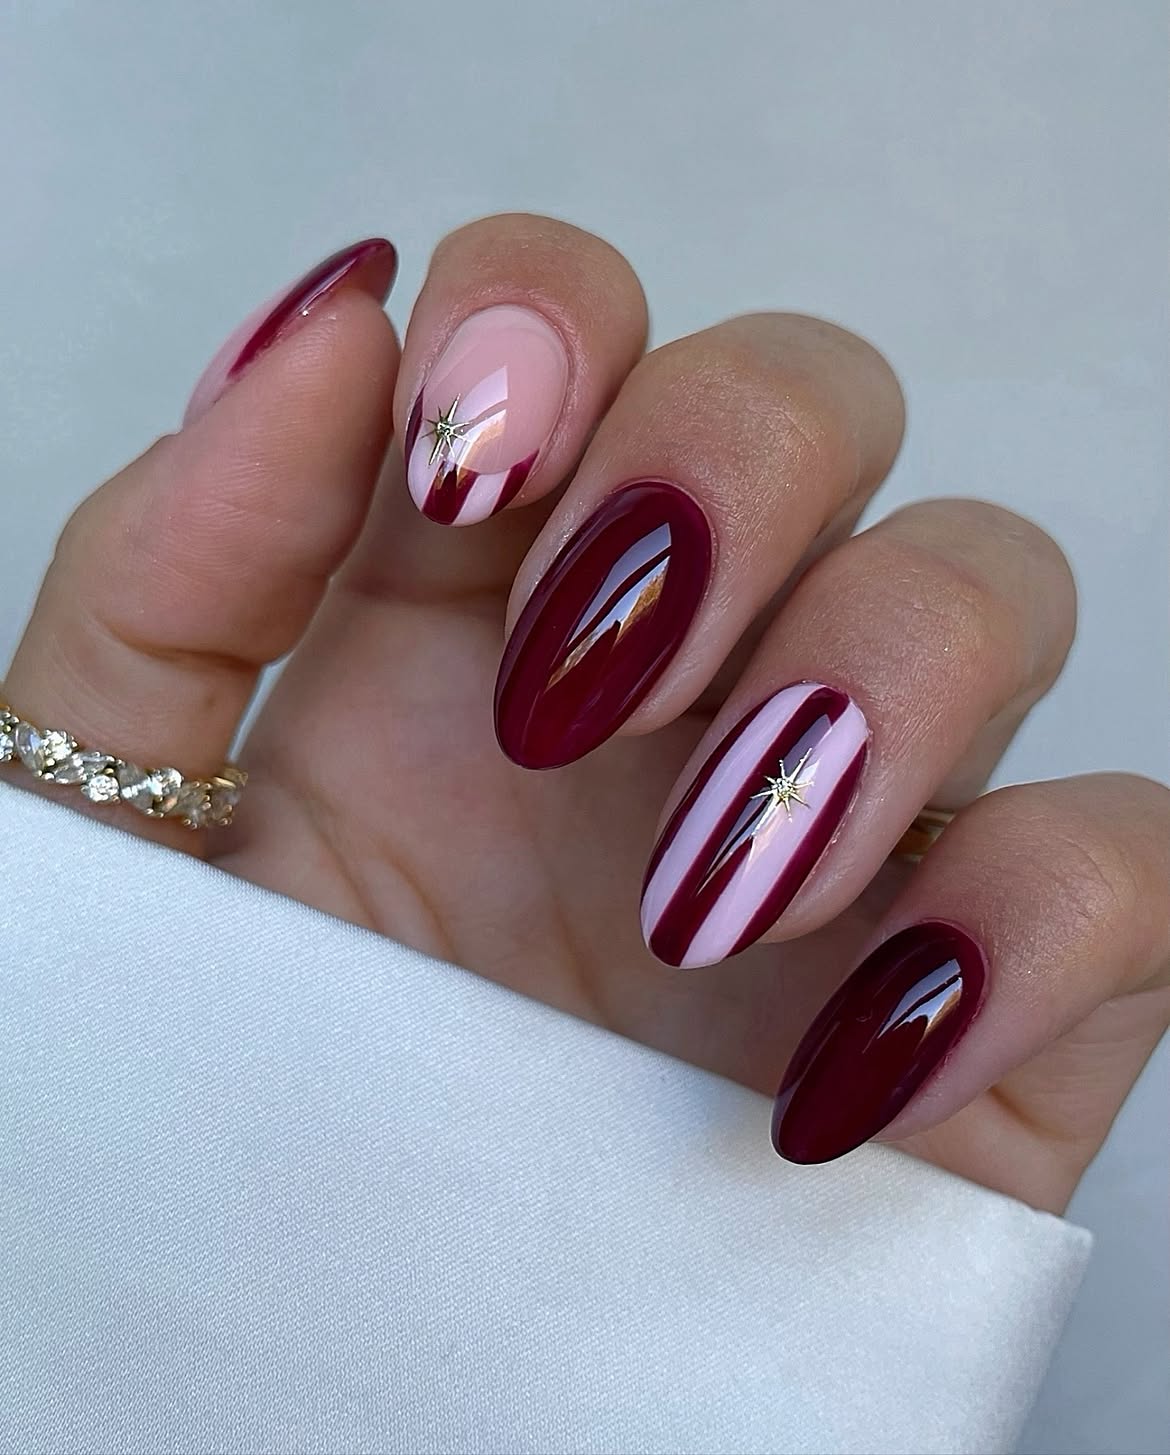
Unleash pure holiday glamour with Burgundy Velvet Nails featuring Gold Celestial Stars. This luxurious manicure showcases a rich, deep burgundy gel polish, often with a subtle velvet-like shimmer that adds immense depth and sophistication. The elegant almond shape enhances the refined aesthetic, making your hands look instantly chic. Delicate gold celestial stars, applied as decals or intricate hand-painted details, create a captivating contrast against the deep burgundy, evoking a sense of nighttime magic. This stunning design is one of the best ideas for enhancing any skin tone, providing a high-gloss finish that shines for any festive occasion.
To achieve this captivating look, begin by shaping your nails into a sleek almond style. Apply two to three coats of a high-quality burgundy gel polish, ensuring full, opaque coverage. For the velvet effect, you can use a fine glitter powder gently patted onto uncured gel, or select a polish with a built-in velvet finish. Once the base is perfected, carefully place gold celestial star decals or hand-paint tiny stars and moons using a fine brush and gold metallic polish. Finish with a durable, high-gloss topcoat to seal in the design and maximize its luxurious shine, ensuring your glamorous nails last throughout all your holiday festivities.
11. Glittery Pink Snowflake Coffin Nails With Pearls
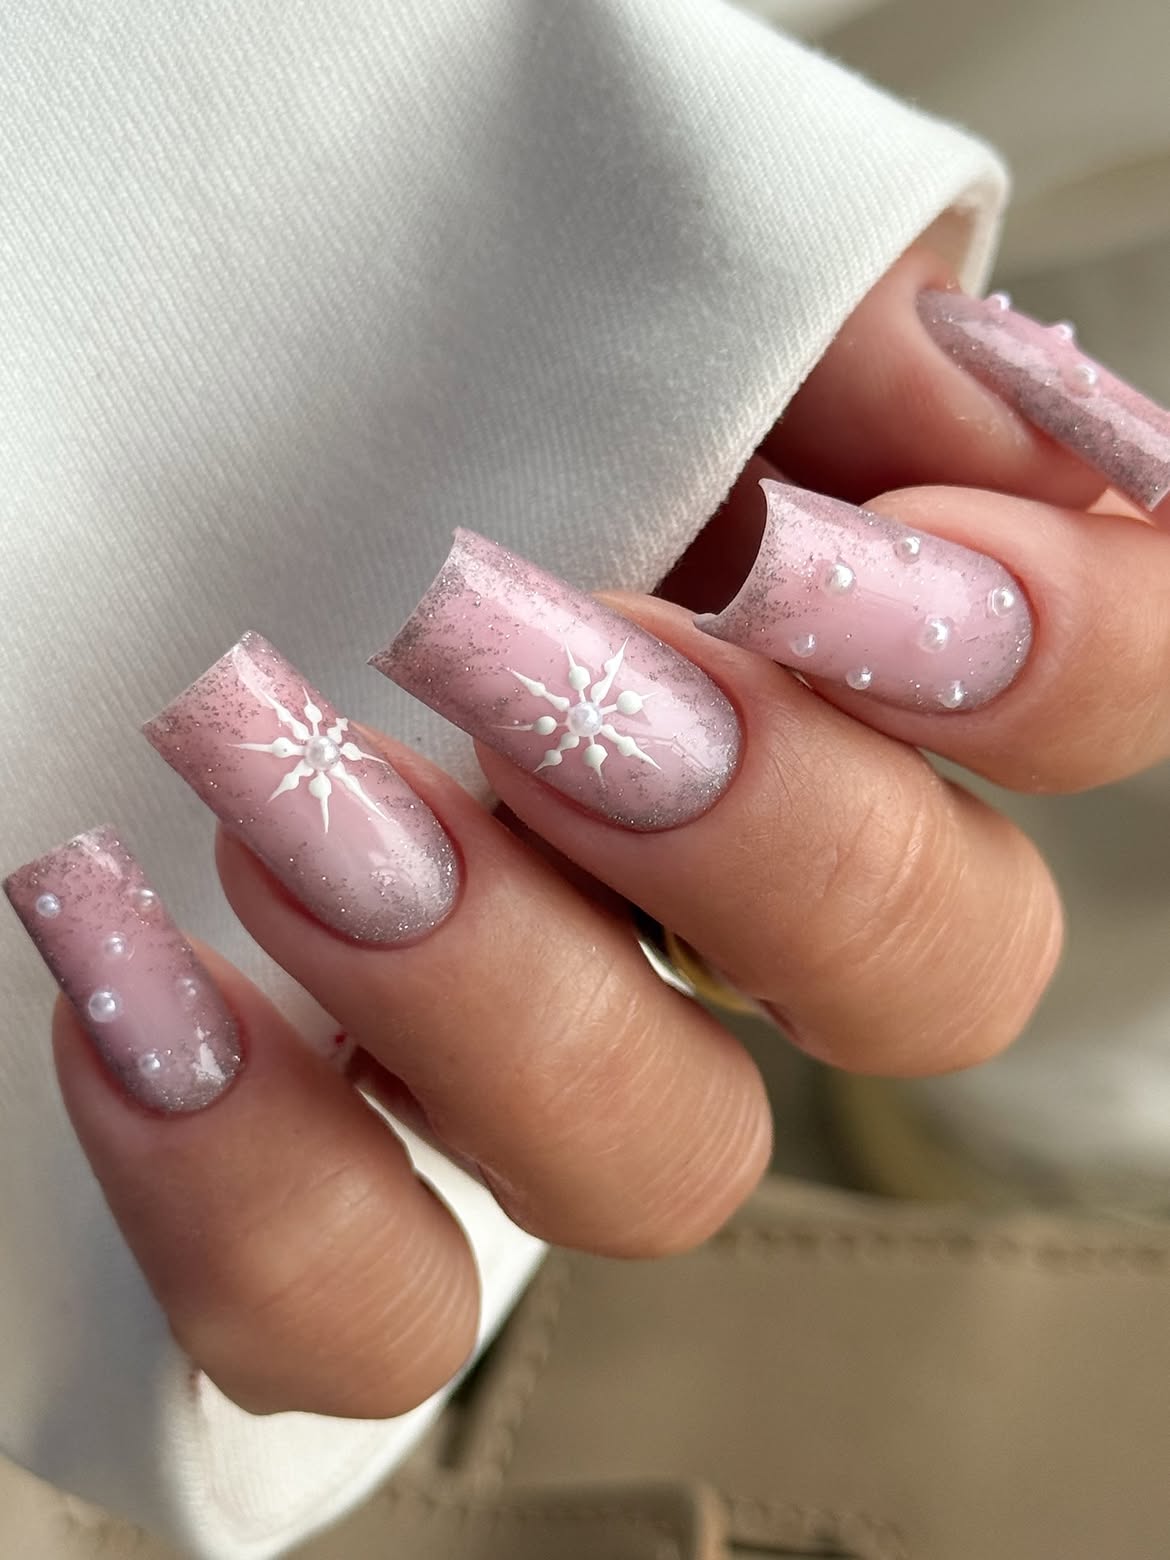
Dive into the whimsical world of December nails with this absolutely enchanting look, perfect for adding a touch of frosty magic to your fingertips. Imagine soft, delicate baby pink coffin-shaped nails, sparkling with a red-toned silver glitter ombre that fades subtly from the cuticle. This design is total inspo for anyone wanting to combine festive flair with feminine elegance. The true enchantment comes from tiny, intricately painted snowflakes and delicate pearl embellishments, creating a dreamy, ethereal vibe. It’s a stunning choice that complements various skin tones, making your hands feel like they belong in a winter fairytale.
Achieving this dreamy style begins with shaping your nails into a crisp coffin silhouette. Start with two coats of a milky baby pink gel polish as your base. While still tacky, gently dab fine silver glitter onto the tips, blending towards the center for that perfect ombre effect. For the snowflake designs, use a thin nail art brush and white polish, ensuring each flake is unique. Carefully attach small flat-back pearls with nail glue or top coat, sealing everything with a high-shine top coat for lasting sparkle. If you’re looking for other stunning looks, check out the matte hunter green style in Idea 8 for a completely different vibe!
12. Glossy Red French Tips With Holiday Holly Art
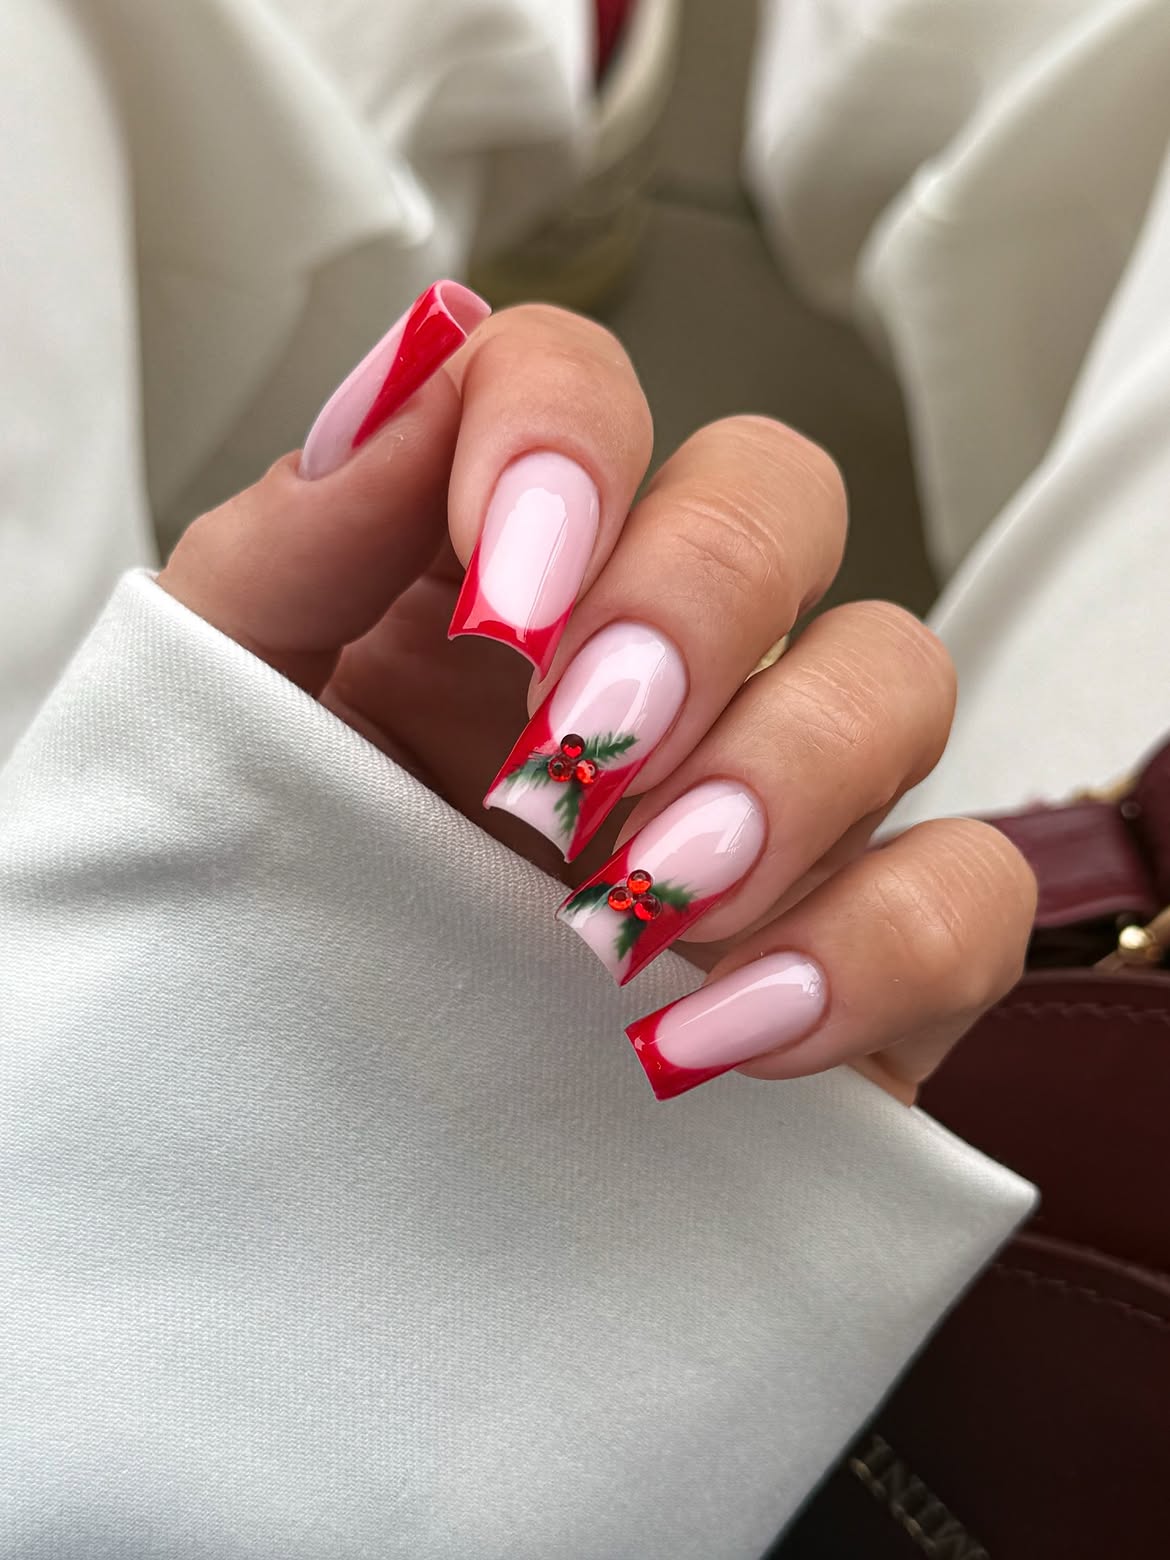
Get ready to turn heads with these spectacularly festive December nails, a classic red French tip elevated with charming holiday holly art. This look takes the timeless elegance of a French manicure and infuses it with vibrant holiday spirit, making it one of our favorite designs for the season. The crisp, glossy red tips pop beautifully against a milky base, offering a sophisticated yet playful aesthetic. Imagine tiny, meticulously placed holly leaves and shimmering rhinestone berries that catch the light, adding just the right amount of sparkle without being over the top. It’s a chic way to embrace the cheer and can be contrasted beautifully with more subdued palettes like the white and blue snowflake nails in Idea 5.
To recreate this festive French tip, begin with a sheer milky white base coat to even out your nail color. Carefully apply a vibrant, opaque red polish to create precise French tips – a steady hand or a French tip guide sticker will be your best friend here. Once dry, use a fine detail brush and dark green polish for the holly leaves, adding small red rhinestones for the berries while the topcoat is still wet. Seal everything with a high-gloss top coat for that perfect, mirror-like finish. This design is a fantastic alternative if you want to skip more complex nail art, offering a simple elegance.
13. Festive Gingerbread And Bow Almond Holiday Nails
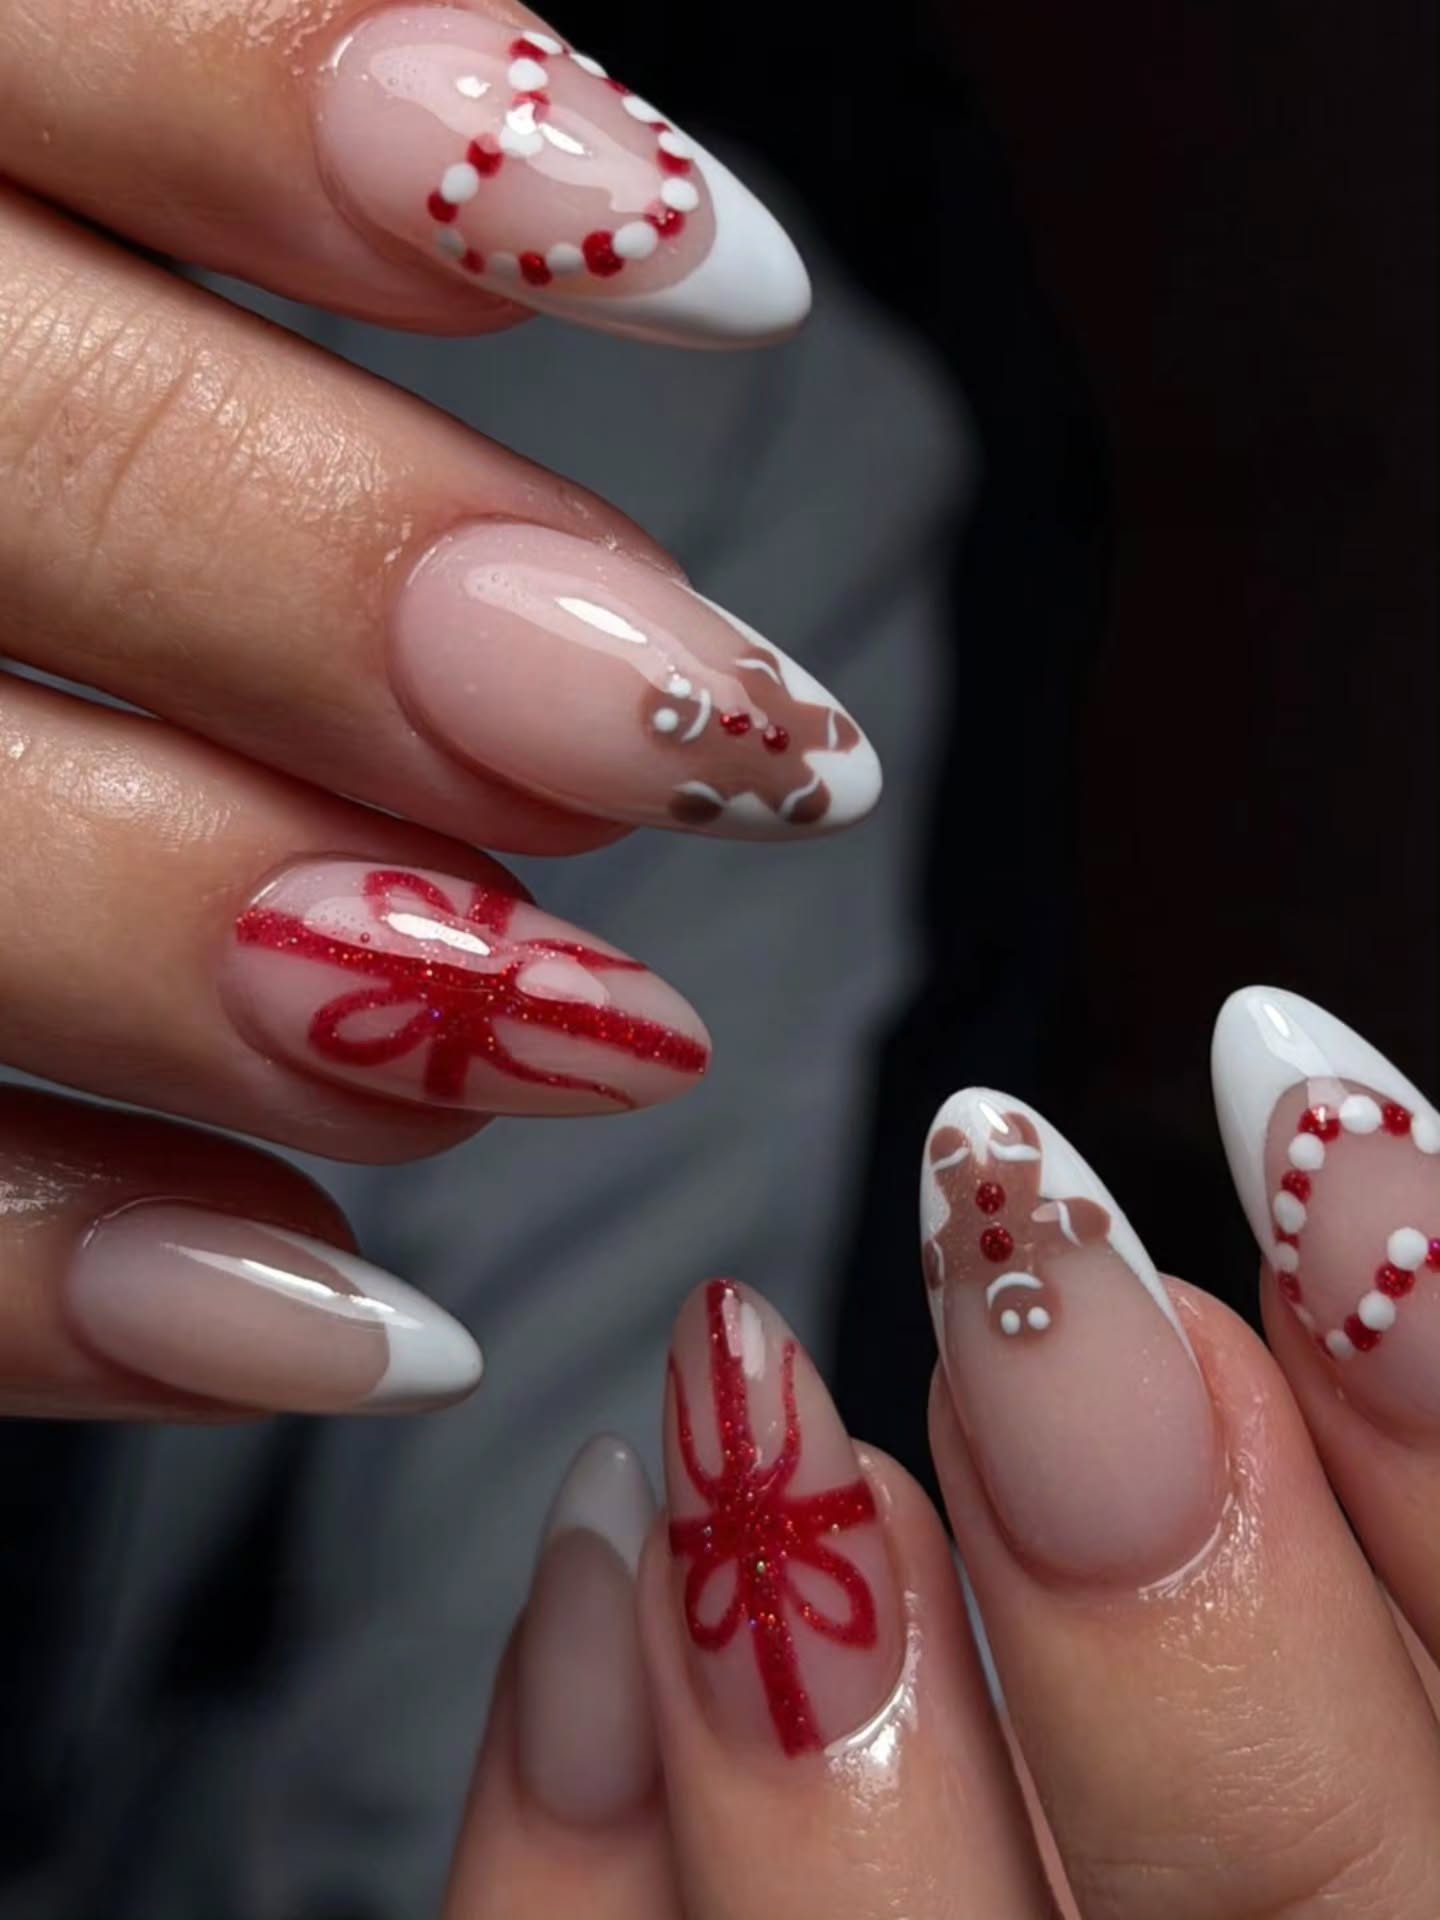
Embrace the sweet side of the holidays with these adorable gingerbread and bow December nails, perfect for anyone seeking charming ideas with a whimsical touch. This almond-shaped design combines playful elements like a cute gingerbread man accent nail with elegant red ribbon bows, all brought together with a glossy finish. It’s a delightful choice that feels festive without being overly complicated, making it a great option for those who prefer simple yet impactful nail art. The look captures the cozy, joyful essence of holiday baking and gift-giving, transforming your fingertips into miniature festive canvases. Even on short nails, this style maintains its adorable appeal.
For these sweet nails, start by shaping your nails into a neat almond form. Apply a neutral or milky base coat to all nails. For the gingerbread man, use a nude-brown polish and a fine detail brush to create the outline and facial features, then add white accents for frosting. On other nails, paint a classic white French tip or full coat, and use a thin brush to draw delicate red bows. A glossy top coat will seal in your artwork and give it that polished shine. This design provides fantastic inspo if you’re looking for a warm, inviting manicure.
14. Plum Winter Snowflake And Knit Long Coffin Nails
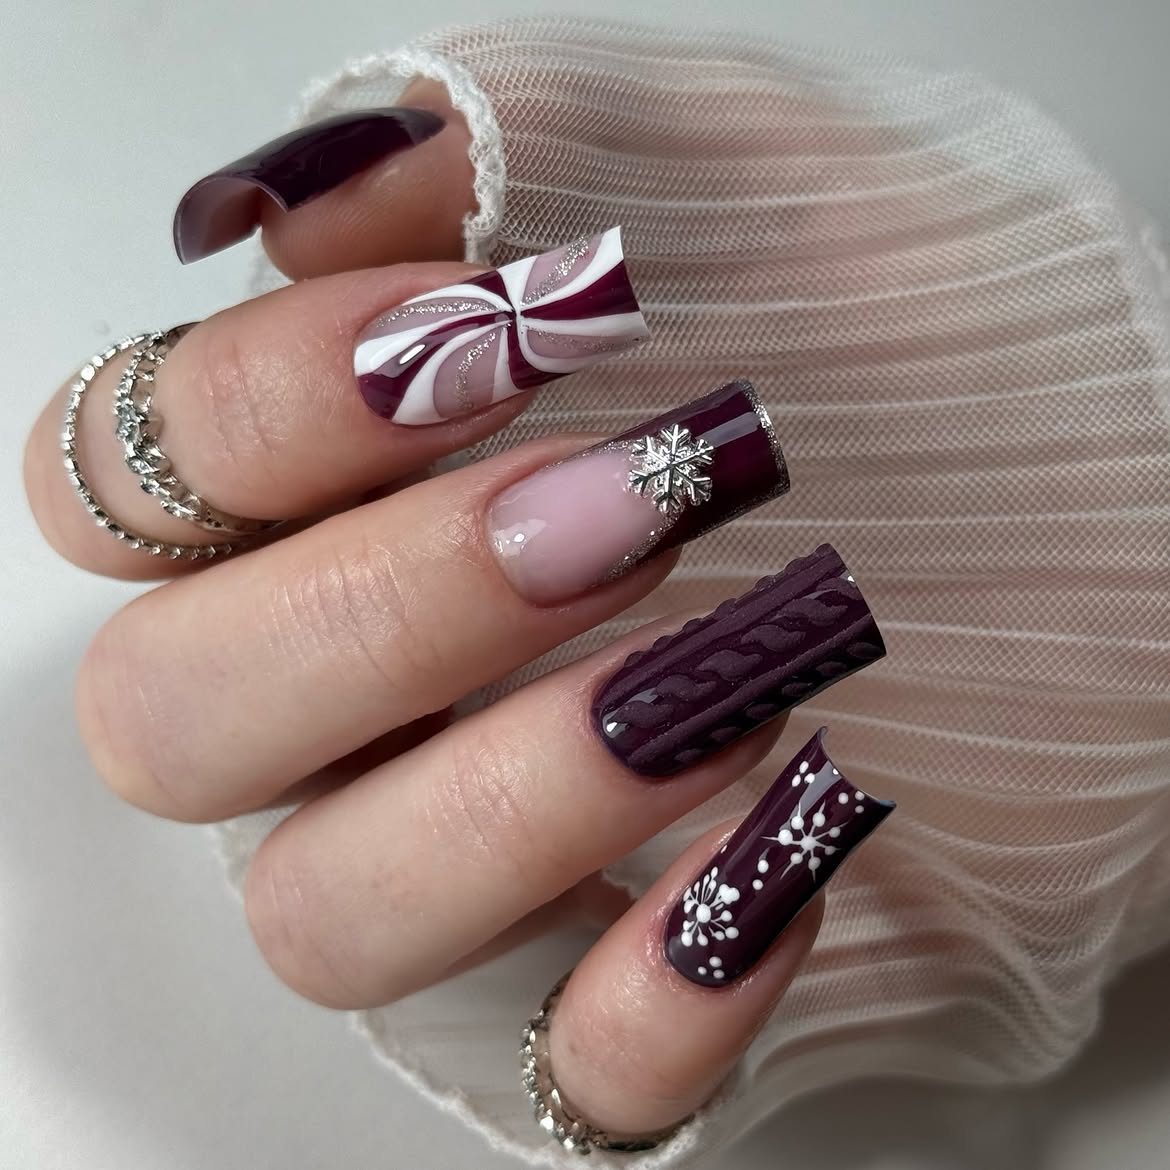
Step into a sophisticated winter wonderland with these stunning plum coffin nails, an elegant choice for December nails that transitions beautifully from early November right through the season. This design features a rich plum purple base, providing a luxurious backdrop for intricate snowflake charms and a cozy knit sweater texture on accent nails. The combination of shimmering silver glitter and delicate swirl nail art adds depth and movement, making each nail a miniature masterpiece. It’s a chic and mature take on winter nail art, perfect for those who appreciate detailed designs with a touch of glamour.
To achieve this look, ensure your nails are shaped into a long coffin silhouette. Apply a deep plum gel polish as your base. For the knit texture, use a thicker builder gel or textured polish and a detail brush to create raised patterns on a couple of accent nails, curing thoroughly. Snowflake charms can be adhered with nail glue or a strong top coat before sealing the entire manicure with a glossy finish. Consider pairing this rich plum with a contrasting shade like the green from Idea 8 for an unexpected but chic color combo.
15. Glittery Dark Blue Winter Snowflake Squoval Nails
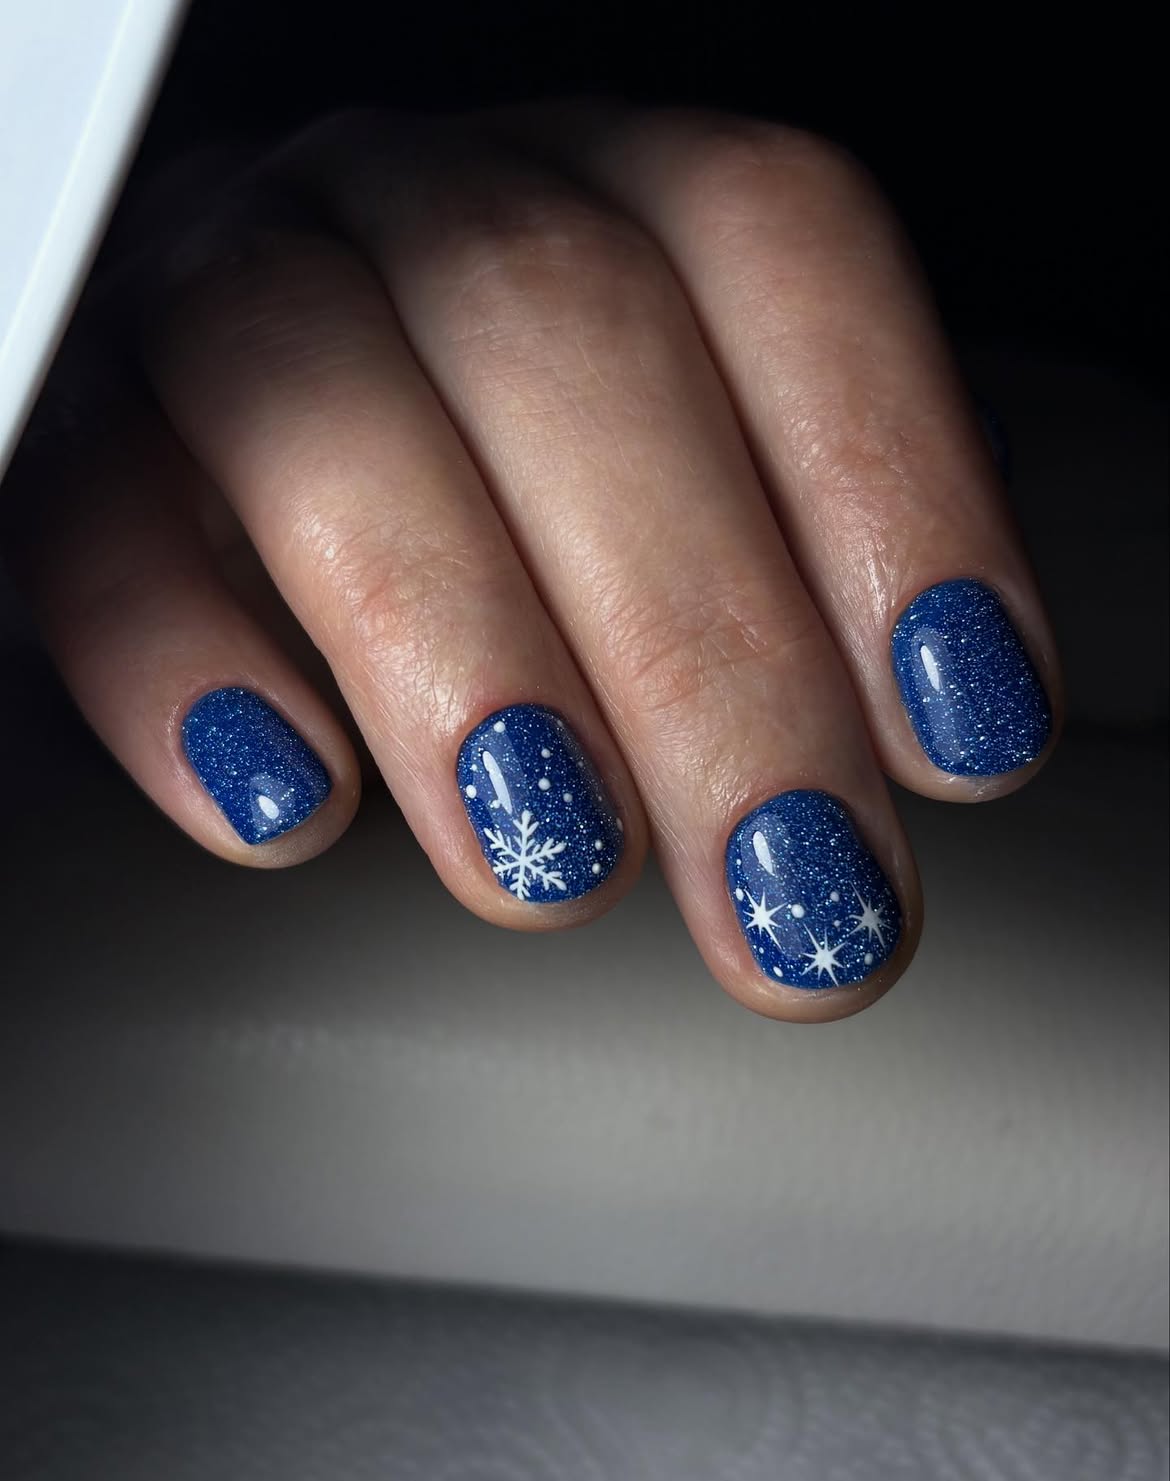
Embrace the frosty beauty of winter with these mesmerizing glittery dark blue snowflake December nails, an enchanting choice for the colder months. This squoval-shaped design features a deep, sparkling blue base that evokes clear winter nights, adorned with delicate white snowflake nail art that seems to dance across your fingertips. The shimmer gel polish gives a subtle, frosty effect, while a standout white starburst accent nail adds a touch of celestial magic. It’s a glamorous yet wearable style that looks fantastic on both longer and shorter nails, making it versatile for any occasion.
Start by shaping your nails into a neat squoval. Apply two coats of a dark blue shimmer gel polish for that deep, glittery base. Once cured, use a fine detail brush and crisp white nail polish to hand-paint the intricate snowflakes. For the starburst effect, paint a small white circle and then radiate thin lines outwards. Seal everything with a high-gloss top coat to protect your art and enhance the sparkle. This design is fantastic inspo if you love a cool-toned palette.
16. Glossy Red and Holly Berry Nail Art
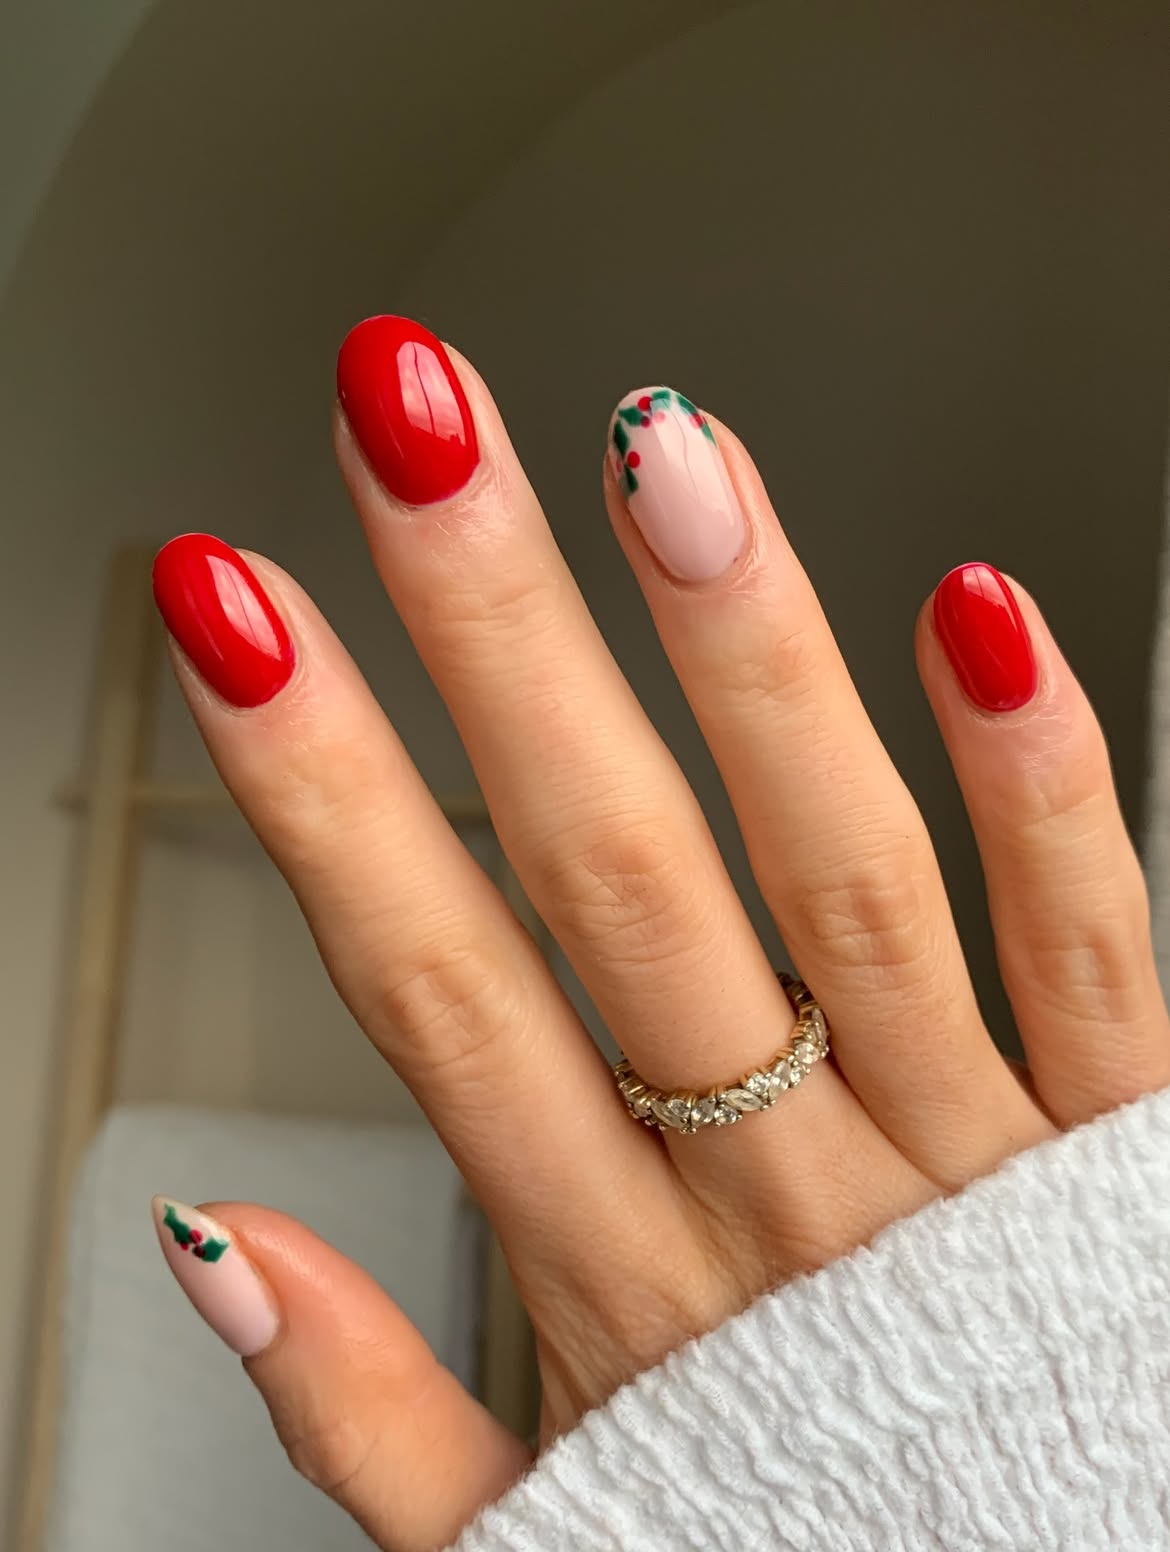
Get into the holiday spirit with these classic glossy red and holly berry December nails, a timeless and utterly charming choice. This festive chic look features a vibrant, high-gloss red base that screams holiday cheer, complemented by delicate holly berry art on accent nails. The milky base under the art allows the detailed designs to truly pop, creating a manicure that’s both striking and elegant. It’s an ideal option for those who want a festive yet simple manicure that embodies the joyful essence of the season without being overly elaborate. The oval shape keeps the look soft and refined.
Begin with an oval nail shape. Apply a rich, opaque glossy red polish to most of your nails. For the accent nail, use a milky white base before carefully painting tiny green holly leaves with a fine brush and adding small red dots for the berries. A clear, high-shine top coat will protect your design and give it that luxurious, wet-look finish. If you’re loving the red, check out the peppermint swirl French tips in Idea 7 for another fun take! This style is great inspo for any holiday gathering.
17. Glossy Red Christmas French Tips And Snowflakes
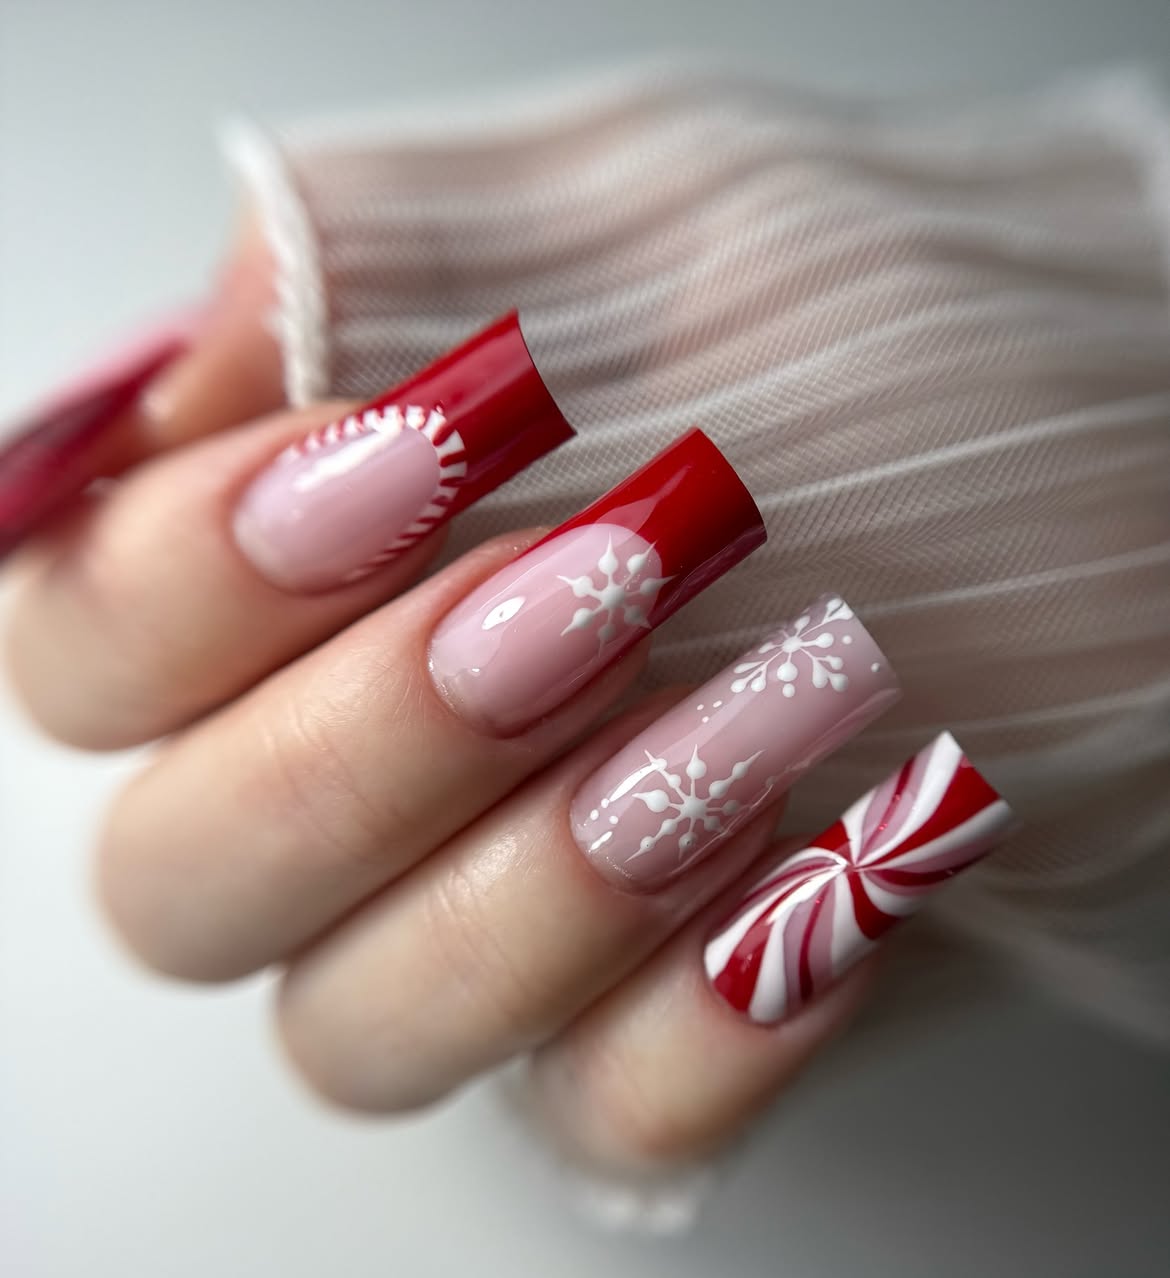
Step up your holiday game with these super chic glossy red Christmas French tips and snowflake December nails! This festive glam look takes the classic French manicure and gives it a vibrant, seasonal twist. Imagine crisp square-shaped nails with a bold candy cane red tip, perfectly offset by delicate white snowflake nail art. An adorable peppermint swirl accent nail adds a playful touch, making this one of our favorite designs for the festive season. The high-gloss finish makes everything pop, creating a manicure that’s both elegant and full of cheer.
Achieve these festive tips by first shaping your nails into a clean square. Apply a sheer nude or clear base coat. Using a vibrant candy cane red polish, carefully create crisp French tips. For the snowflake detail, use a thin brush and white polish. The peppermint swirl accent nail can be created by alternating thin lines of red and white polish and then swirling them together with a dotting tool or toothpick. Finish with a generous layer of high-shine top coat. This is a great alternative to the simple holly berry art in Idea 6 if you want more intricate patterns.
18. Matte Hunter Green Winter Sweater Nail Art
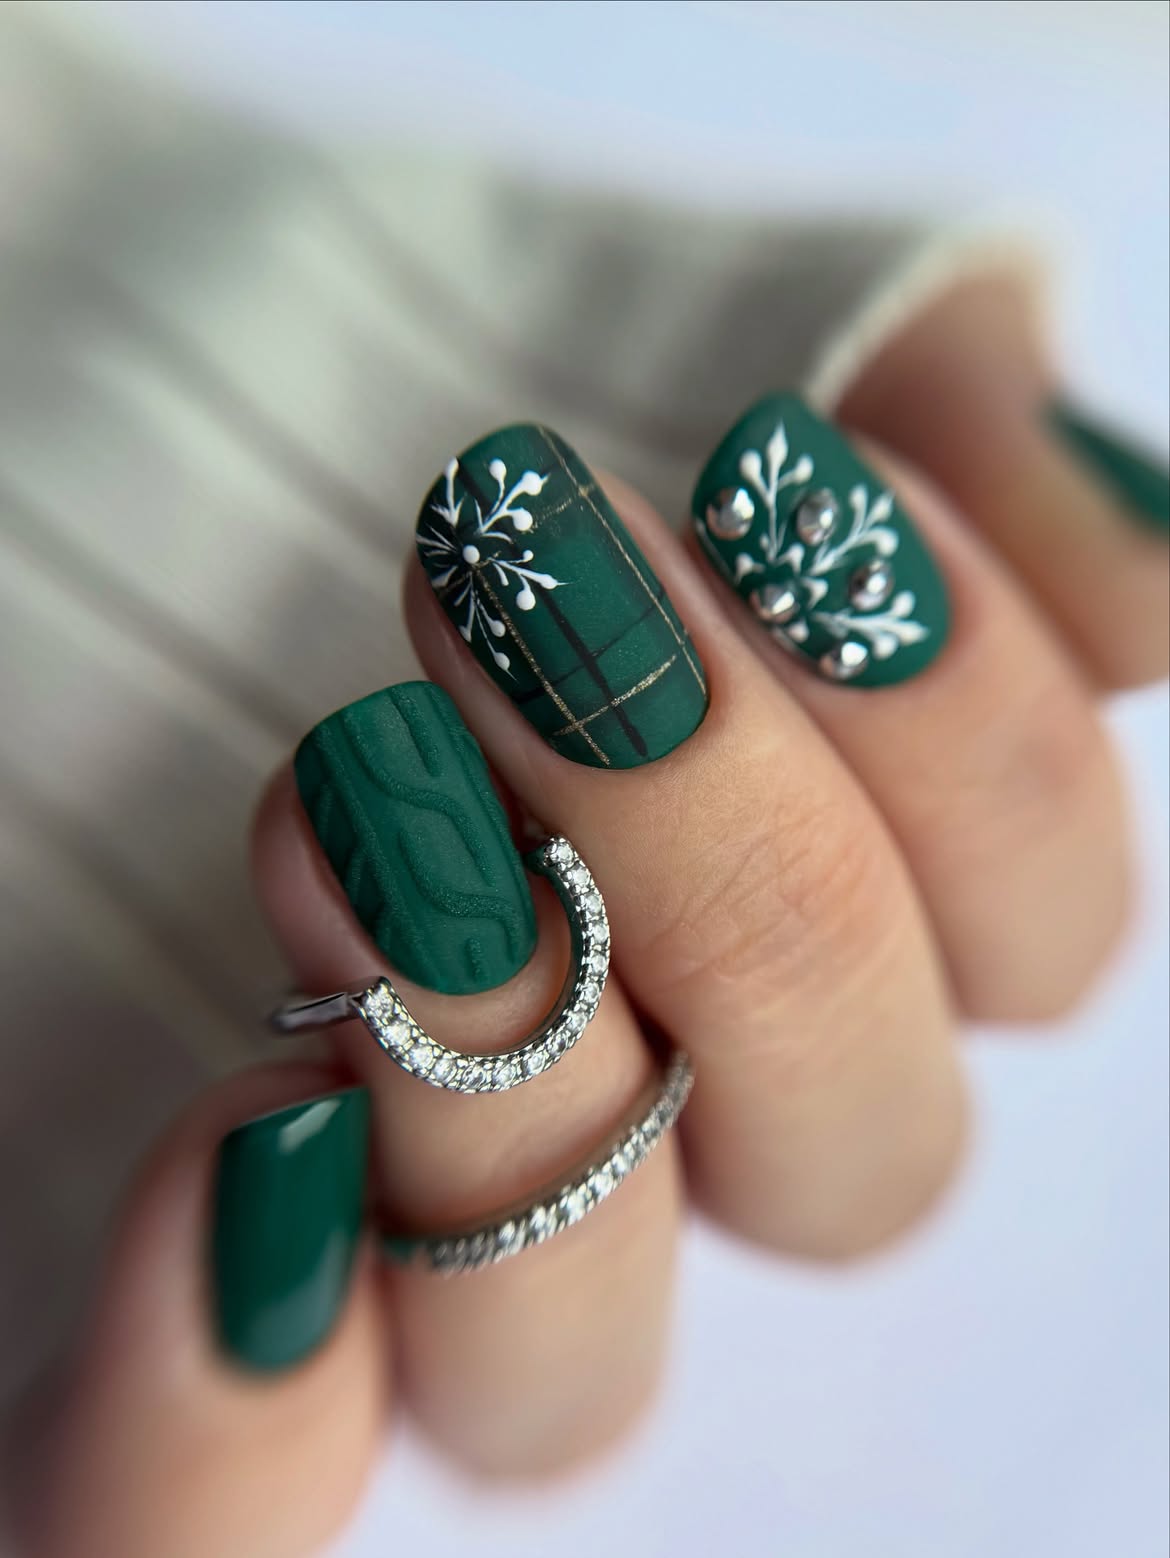
Cozy up with these stunning matte hunter green winter sweater December nails, a perfect blend of comfort and chic. This look brings the warmth of your favorite winter knitwear to your fingertips with a sophisticated matte finish. The deep hunter green provides a rich, earthy base, beautifully accented by intricate sweater knit textures and delicate hand-painted snowflakes. A subtle plaid nail art on one or two nails adds another layer of cozy charm. This style is particularly fantastic for short squoval nails, proving that you don’t need long lengths to make a statement, and offering a more simple approach to holiday style.
To get this warm winter vibe, shape your nails into a short squoval. Apply two coats of a matte hunter green polish. For the sweater knit texture, use a slightly thicker gel or textured polish and a fine detail brush to create raised patterns; cure if using gel. Hand-paint tiny white snowflakes with a thin brush. For the plaid, use contrasting thin lines of white or gold. Ensure all details are completely dry before applying a matte top coat to seal everything in. If you’re into darker, sophisticated shades, this is great inspo.
19. Glossy Burgundy And Gingerbread Christmas Nail Art
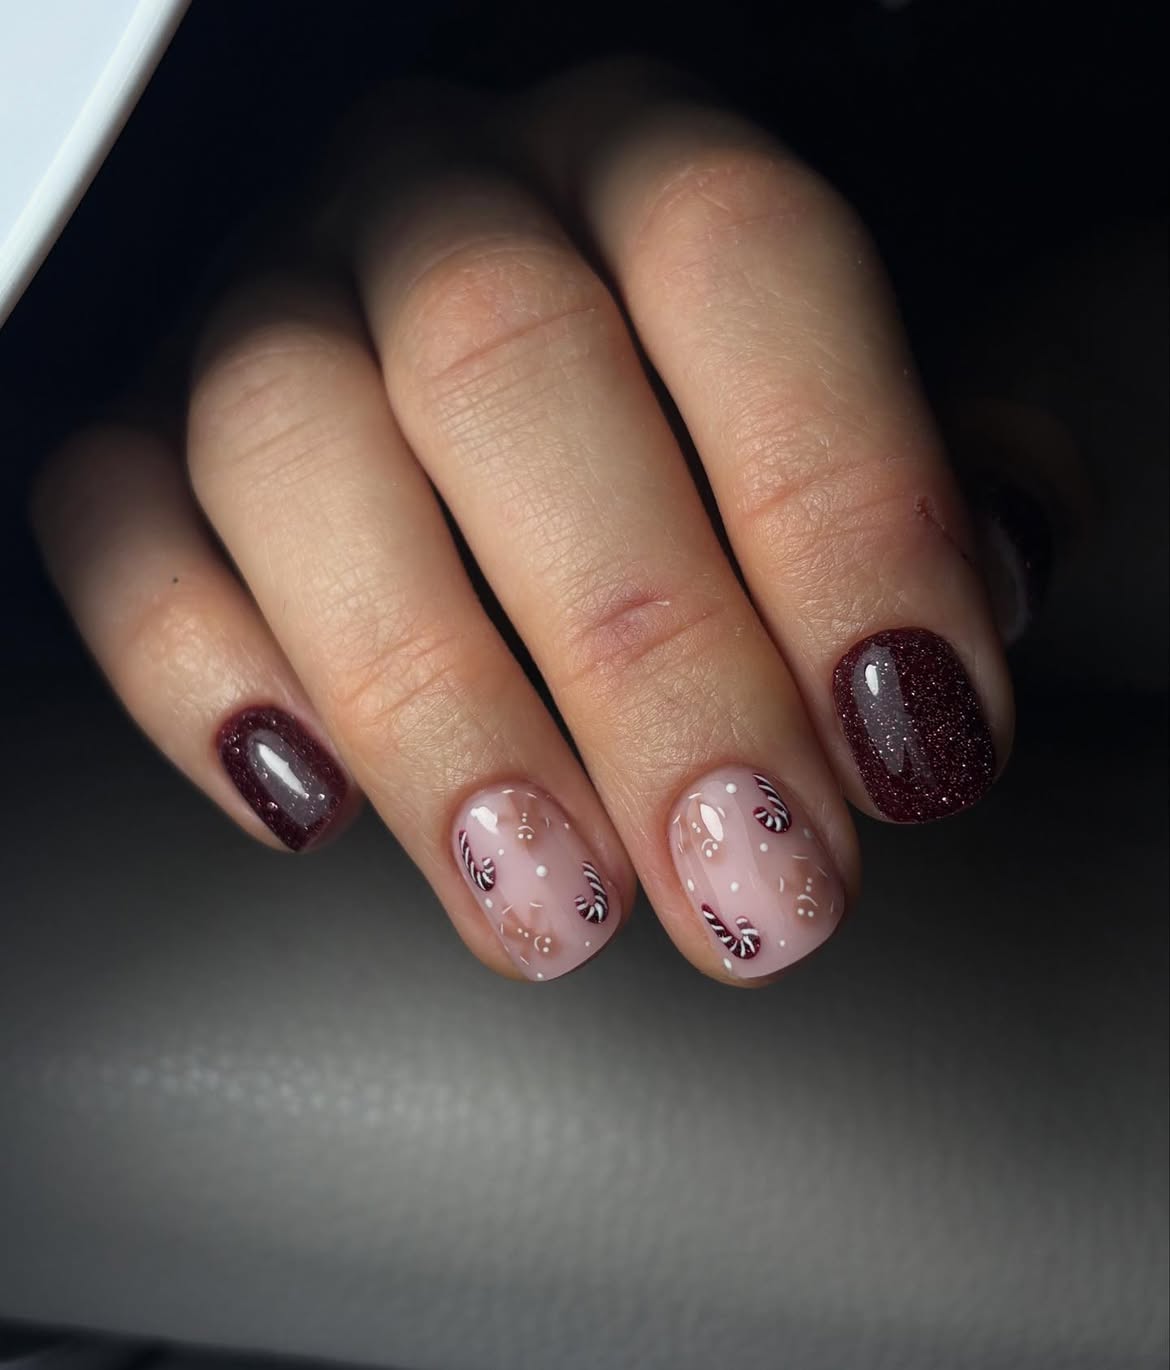
Get ready for the festive season with these delightful glossy burgundy and gingerbread Christmas December nails, a perfectly sweet and sophisticated choice that works well from early November onwards. This holiday manicure combines the richness of burgundy glitter with adorable gingerbread man art, creating a look that’s both elegant and playful. Candy cane striped nails add a classic touch, while the milky base allows the detailed designs to truly pop. The squoval shape offers a modern edge, and the beautiful burgundy hue complements a wide range of skin tones, making it a versatile option for everyone.
Start by shaping your nails into a neat squoval. Apply a deep burgundy glitter polish to some nails for a shimmery base. For the gingerbread man, use a nude-brown polish and a fine detail brush for the details on a milky white base. Create candy cane stripes using thin lines of red and white polish. A glossy top coat will seal in your festive art and enhance the shimmer. This design is fantastic inspo if you love combining classic Christmas elements with a touch of sparkle.
20. Festive Pink Winter Wonderland Bear Nail Art
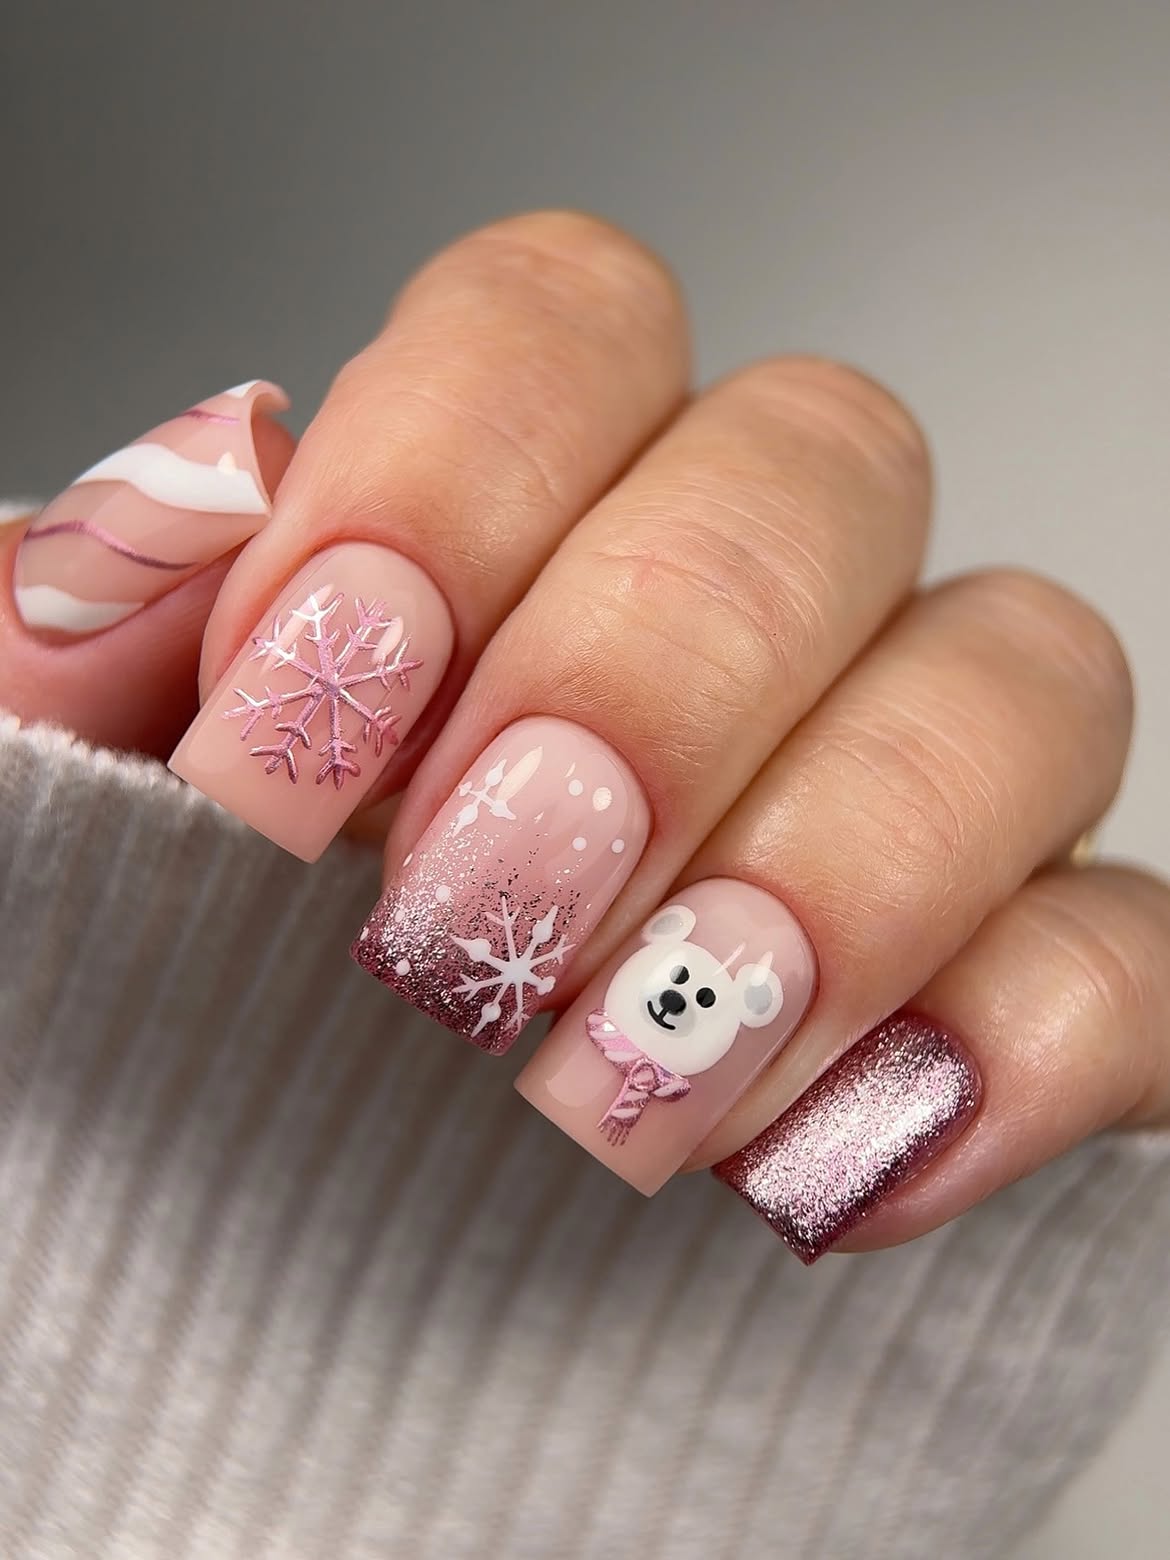
Step into a whimsical winter wonderland with these utterly adorable festive pink bear December nails! This coquette pink design is brimming with charm, featuring a delicate pink glitter base that twinkles like fresh snow. Intricate snowflake nail art adds a touch of frosty magic, while the standout 3D bear art makes this one of the most unique and playful ideas for the season. The glossy finish enhances every detail, making these squoval-shaped nails feel like tiny treasures. It’s perfect inspo for anyone wanting to combine cuteness with winter elegance, showcasing creative designs that truly stand out.
To create this dreamy look, begin by shaping your nails into a squoval. Apply a soft pink glitter polish as your base. Use a fine detail brush and white polish for the delicate snowflake art. For the 3D bear, you’ll need modeling gel or acrylic powder mixed with gel to sculpt the small bear shape on an accent nail, curing thoroughly. Finish with a high-shine top coat to encapsulate all the details and provide a smooth, glossy surface. If you loved the cute gingerbread man in Idea 3, this bear art takes the playful element to the next level!
21. Sparkly Black And Pink Snowflake Square Nails
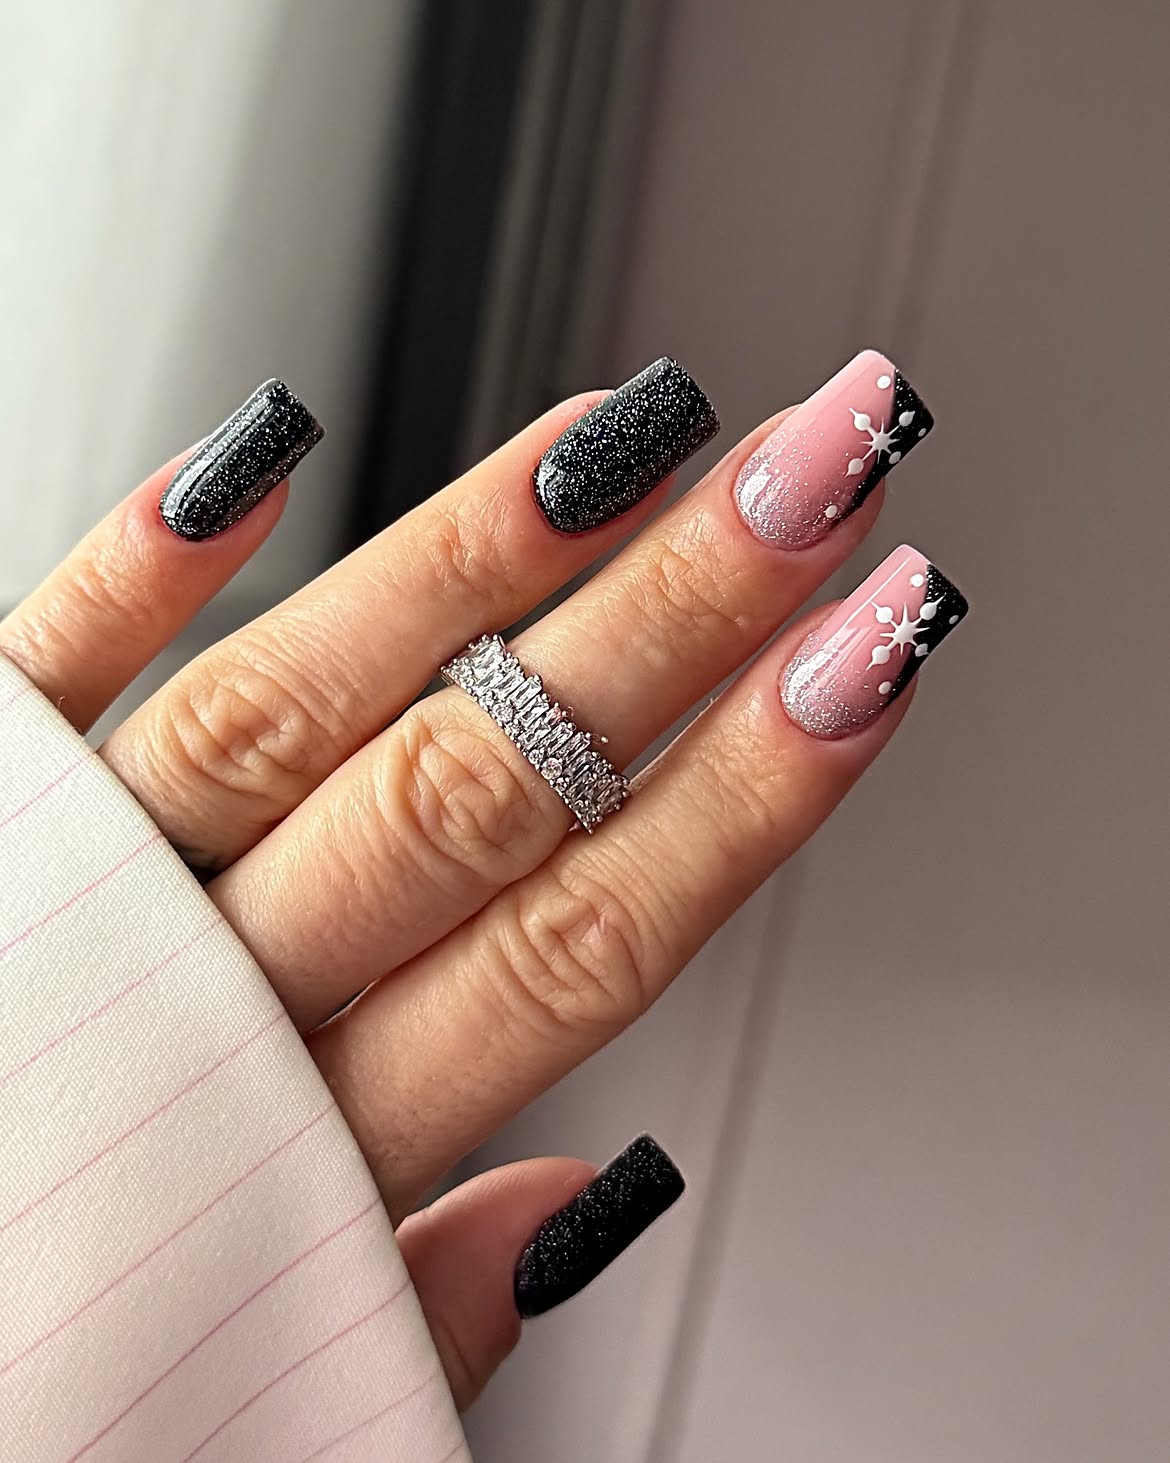
This chic design takes classic December nails to a sophisticated new level by blending a soft pink base with striking black glitter accents and delicate white snowflakes. The square shape offers a modern edge, making it perfect for those who want a festive yet refined look that stands out from typical holiday designs. It’s a gorgeous way to incorporate winter charm without going overtly traditional, allowing for versatility throughout the season.
To achieve this elegant style, start with a sheer nude or soft pink polish as your base. Once dry, carefully apply a fine black glitter polish to accent nails, or create a chic gradient effect. For the snowflakes, use a thin nail art brush and white gel polish, curing after each detail to prevent bleeding. Finish with a high-gloss top coat to seal your designs and add an extra layer of sparkle. Consider pairing this with a subtle red lip for a complete holiday ensemble.
22. Glossy Red Candy Cane French Square Nails
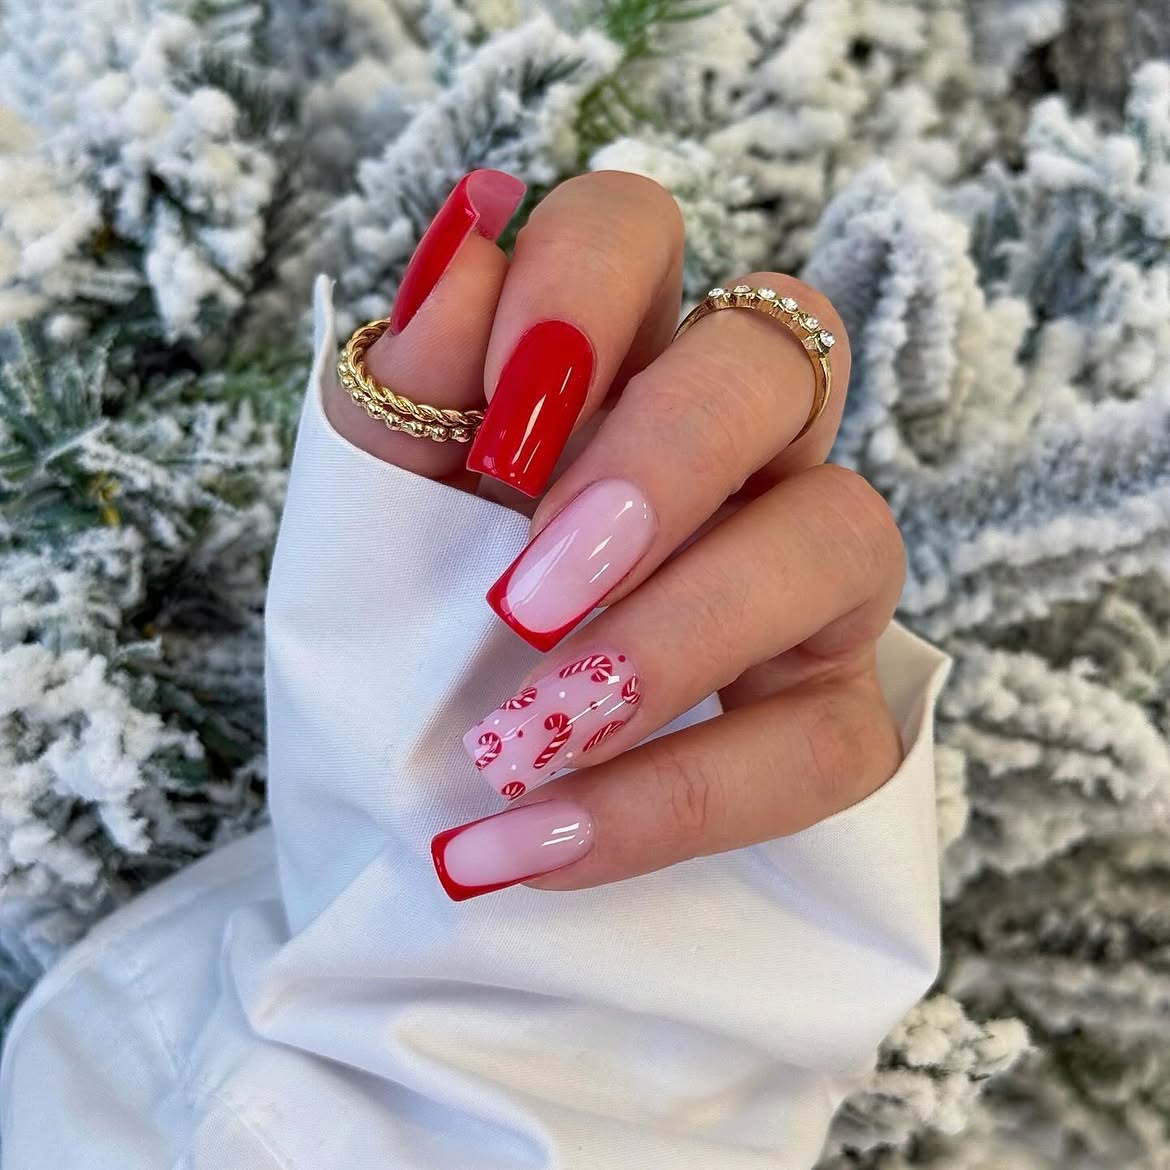
Nothing quite screams holiday cheer like classic candy cane stripes, and this rendition offers a fresh take on festive designs with a modern French tip. The vibrant, glossy red tips against a milky pink base evoke a nostalgic Christmas feel, while the crisp square shape keeps the look contemporary and polished. It’s an ideal inspo choice for anyone seeking a playful yet elegant manicure that perfectly captures the spirit of the season.
Begin with a milky pink or sheer nude base on your nails, allowing it to dry completely. For the candy cane French tips, use a fine nail art brush to create the red tip, then add thin white stripes horizontally across the red. Precision is key here to achieve a neat, crisp look. If you’re looking for a simple alternative, you can opt for just the red French tip and add a single white accent stripe on one nail. Seal with a super glossy top coat for that irresistible candy-like finish.
23. Festive Sparkle Snowflake And Candy Stripe Nails
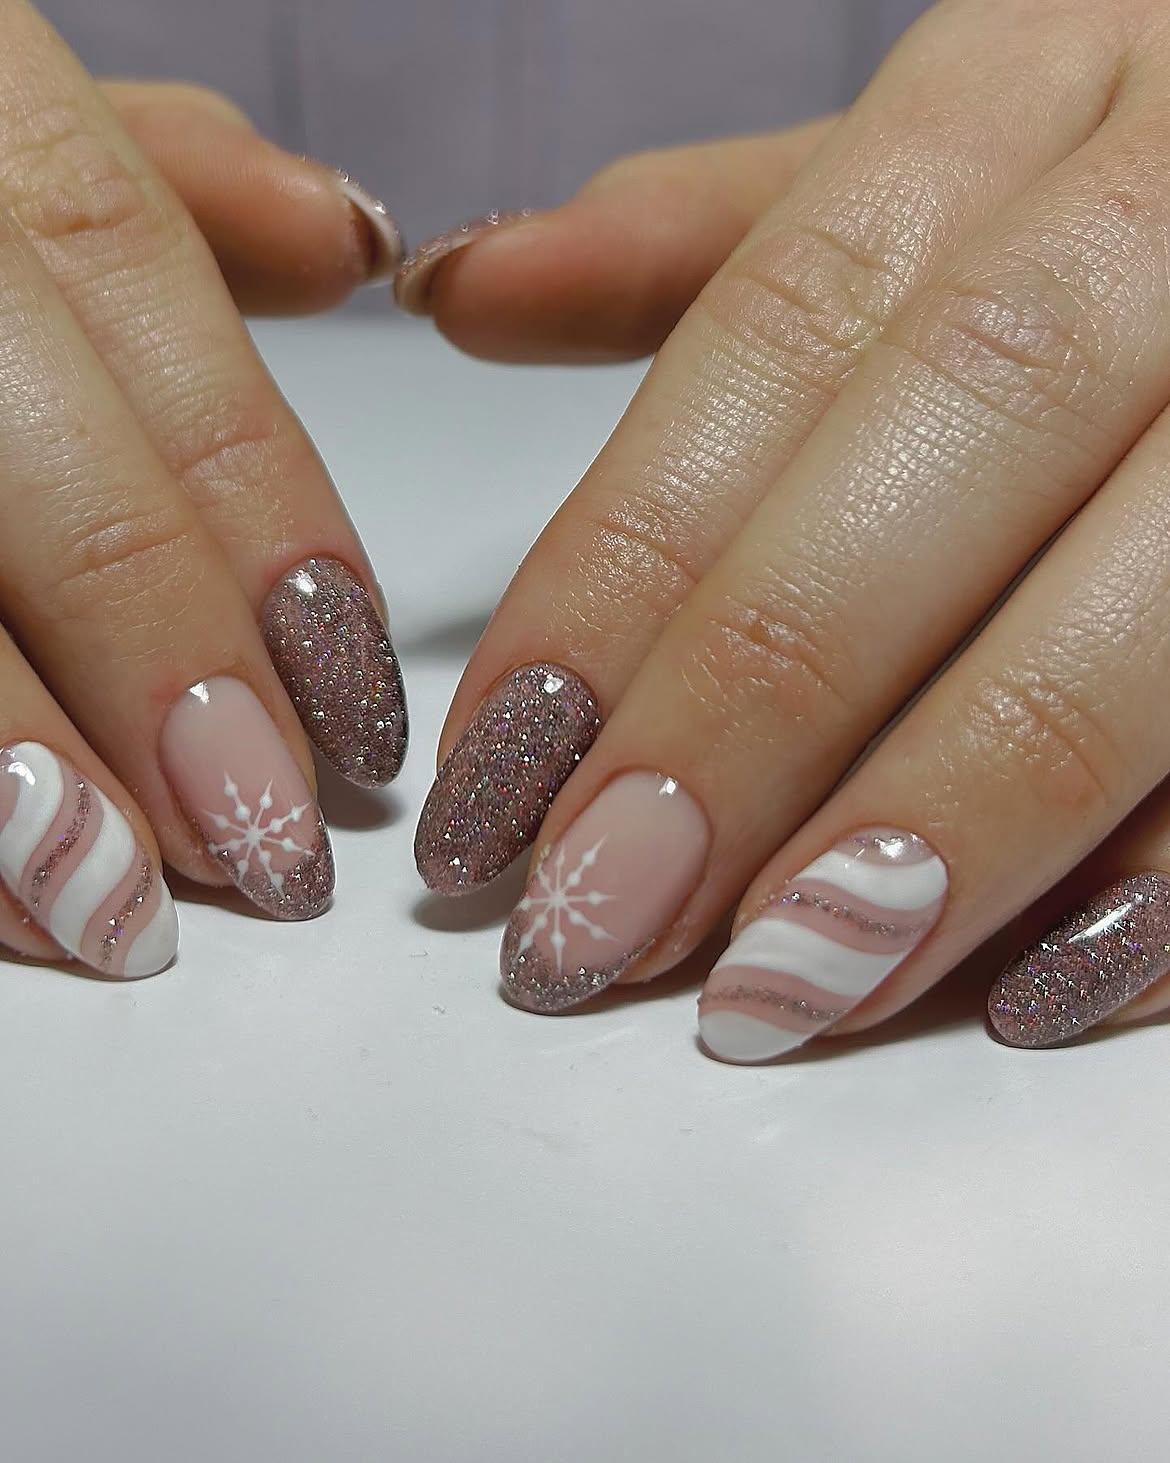
This spirited manicure combines several holiday favorites into one dazzling display, featuring intricate snowflakes, cheerful candy stripes, and an all-over sparkle that catches the light beautifully. The palette balances traditional red and white with subtle shimmers, creating a dynamic and celebratory look. It’s perfect for those who love to go all out during the festive season, offering a medley of classic motifs that feel both joyful and sophisticated. If you enjoyed the classic candy cane look in Idea 2, you’ll love this bolder, more varied approach to festive patterns.
Start with a shimmery pink base to enhance the sparkle. For candy stripes, use a striping brush with red and white polishes. For snowflakes, a dotting tool and fine brush will help create delicate details. Incorporate fine glitter or iridescent flakes into your top coat for an extra magical touch. For a twist, consider adding a tiny accent of deep green or a cool blue glitter on one nail to introduce another classic Christmas hue without overwhelming the design.
24. Glossy Red Candy Cane Swirl Christmas Nails
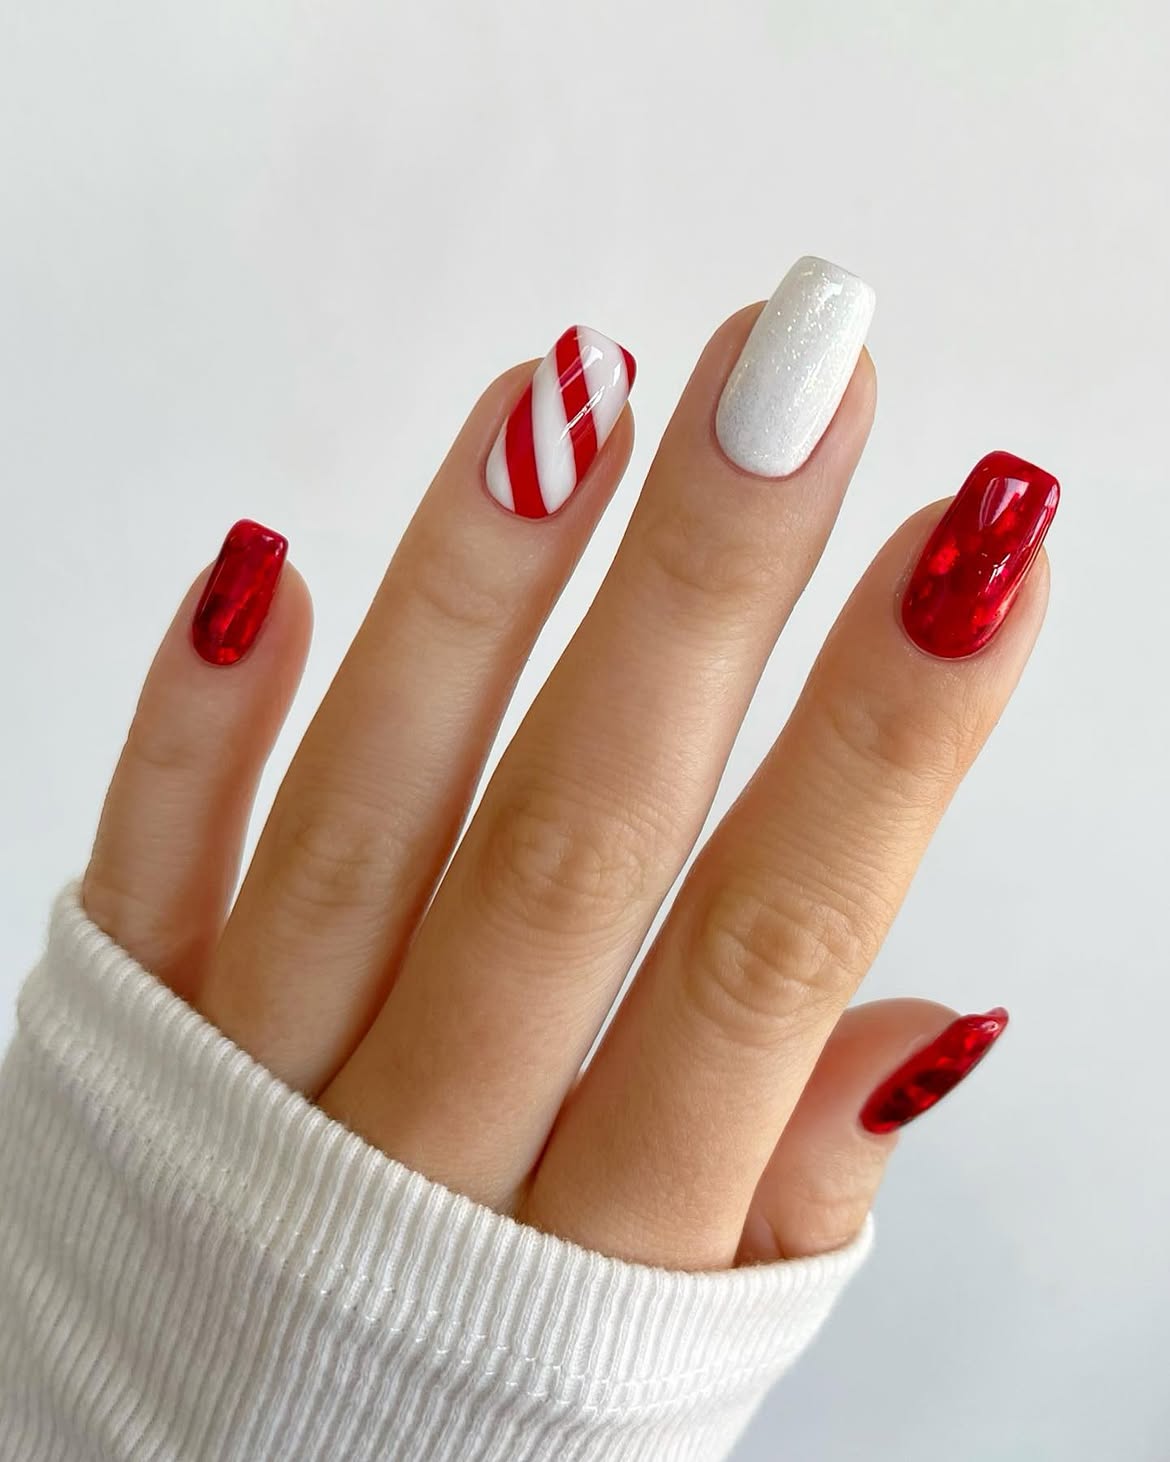
Embrace the sweetness of the season with these delightful candy cane swirl designs, featuring luscious glossy red and crisp white intertwined in a mesmerizing pattern. This festive style provides a playful yet sophisticated take on holiday cheer, making your December nails truly pop. The swirling pattern offers a softer, more fluid aesthetic compared to linear stripes, providing a unique visual texture that is both eye-catching and artful.
Achieve these luscious swirls by applying a base coat, then a couple of layers of milky white polish. While the white is still slightly tacky (or with a gel base), use a dotting tool or fine brush to swirl vibrant red polish into the white, creating that distinct candy cane effect. The specific skin tone of your hands can influence the exact shade of red that looks best; cooler tones might prefer a blue-based red, while warmer tones can rock an orange-based red. Finish with a high-shine top coat to lock in the glossy, tempting finish.
25. Metallic Red And White Holiday Snowflake Stiletto Nails
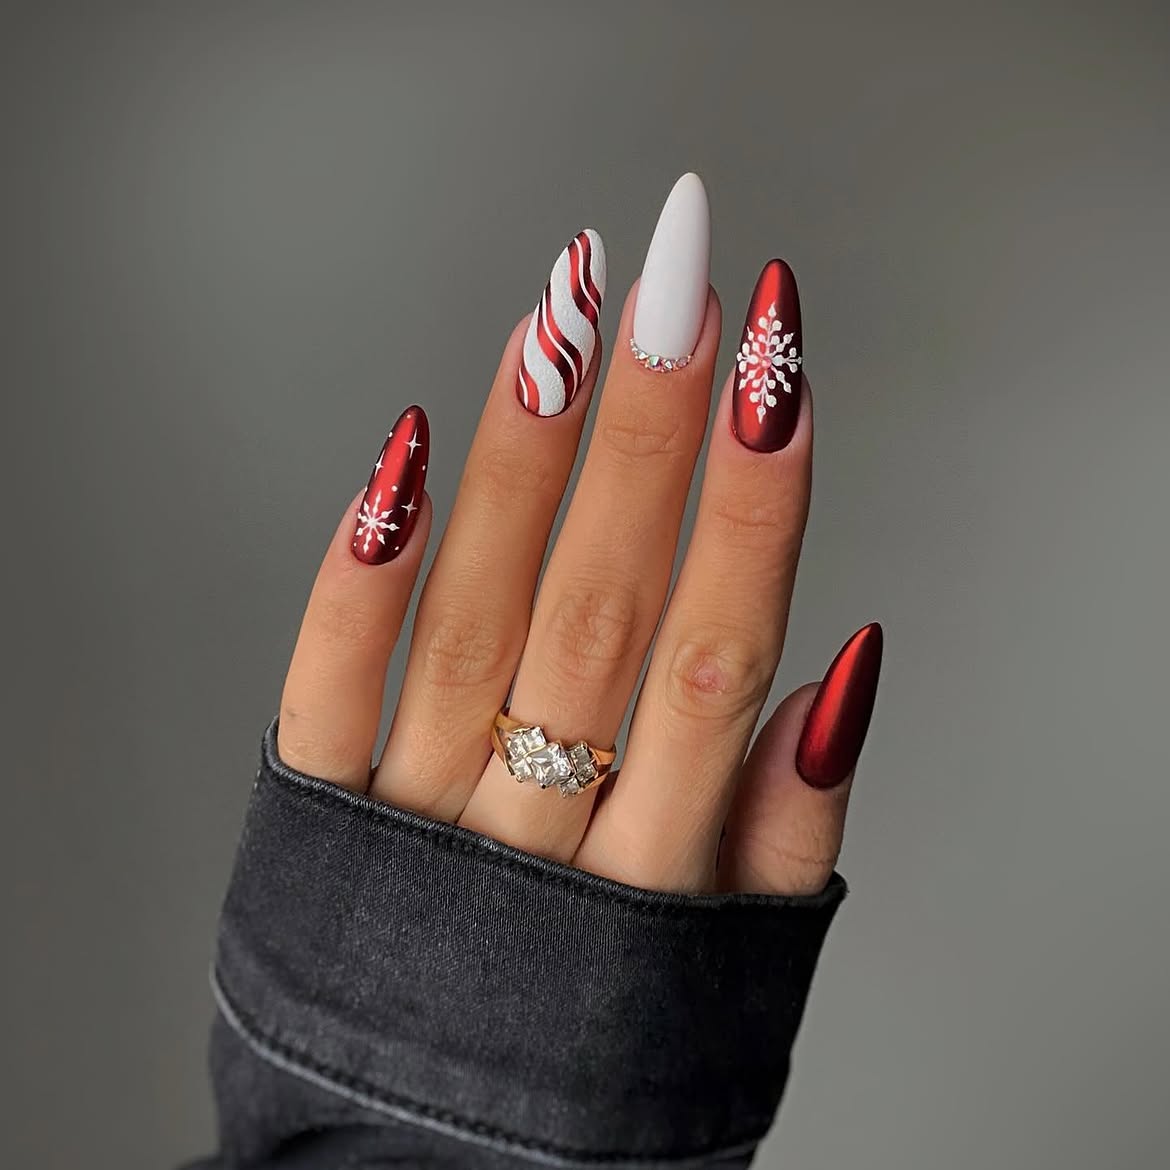
For those who love a dramatic flair, these metallic red and white stiletto nails are pure holiday glam. Combining sharp stiletto tips with intricate snowflake designs and subtle candy cane accents, this look makes a bold statement. The metallic finish adds a luxurious sheen, perfect for evening festivities or anyone wanting to channel their inner ice queen. It’s a fierce yet festive choice, showcasing elegance with a modern edge.
Begin by shaping your nails into a sharp stiletto. Apply a metallic red polish as your base. For the snowflake designs, use a fine brush with white polish, or try stamping plates for intricate patterns. Add small rhinestone details near the cuticle for extra sparkle. While this design is bold on longer nails, don’t shy away from adapting elements for short nails; a metallic red base with one detailed snowflake accent can be equally stunning and easier to manage daily.
26. Festive Red And Pink Knit Christmas Nails
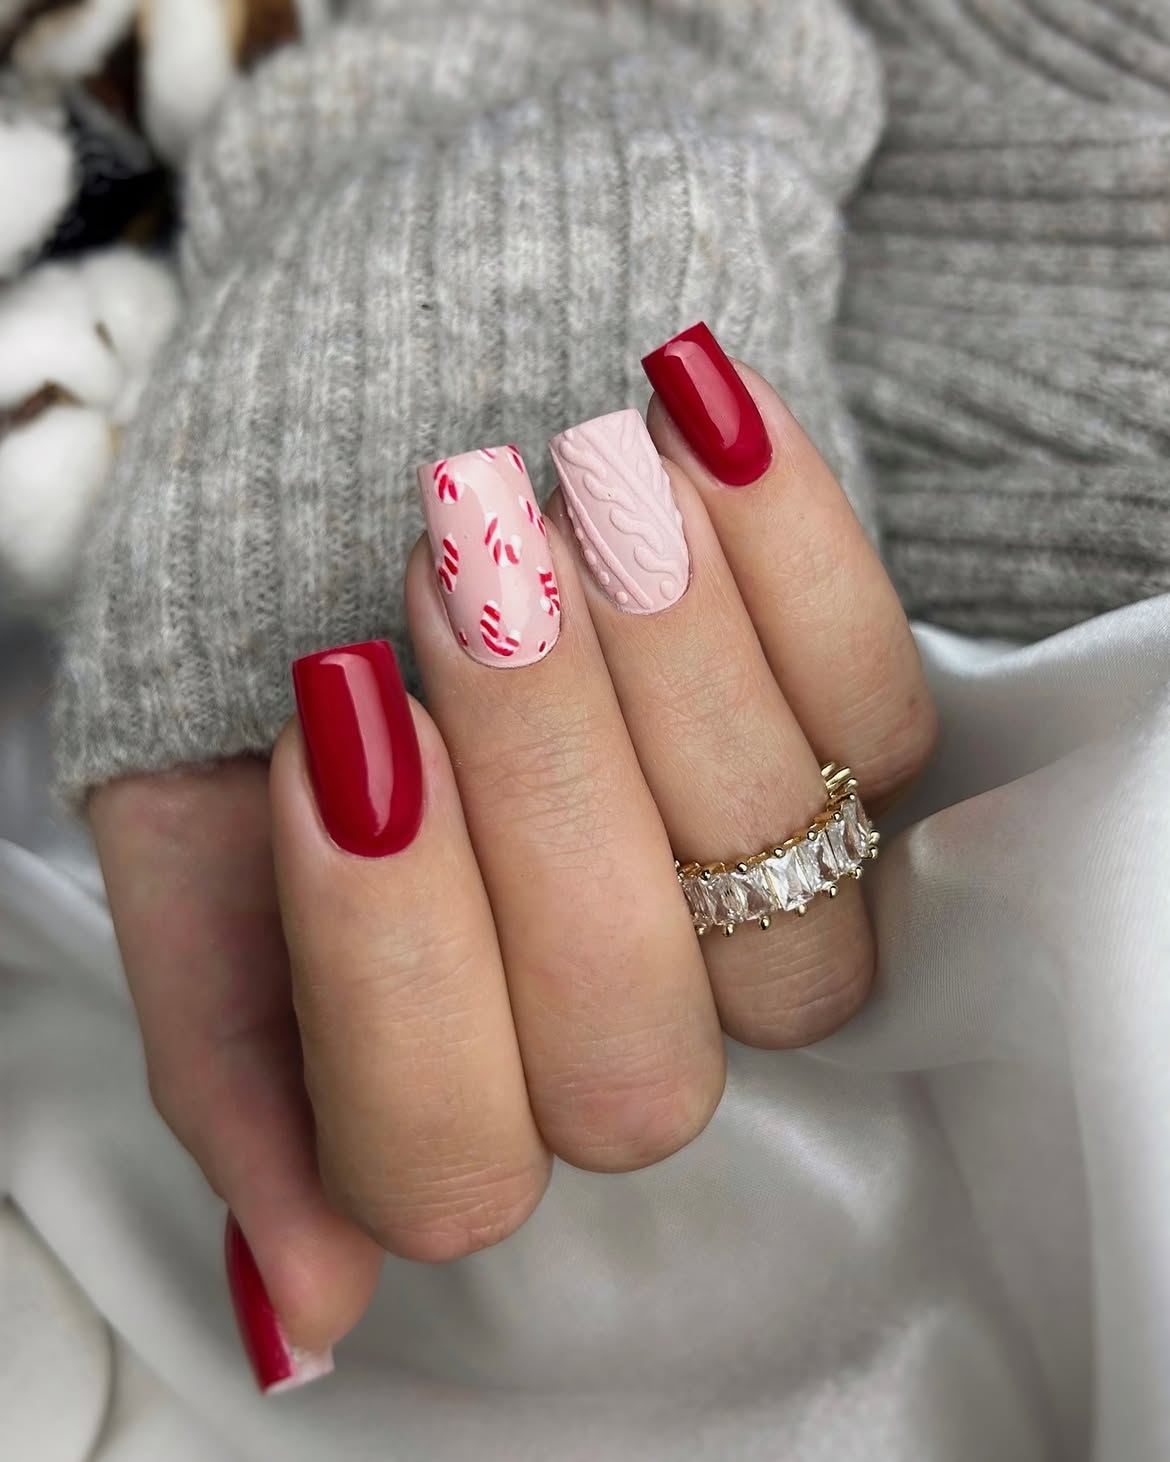
Cozy up your fingertips with these adorable knit-textured designs, blending warm red and soft pink hues for a truly inviting Christmas vibe. The 3D sweater effect adds a tactile, cozy element that’s utterly charming and unique, making your nails feel as snug as your favorite holiday jumper. This look is perfect for those who appreciate comfort and warmth during the colder months, offering a delightful alternative to traditional glitter and glam. This particular style is a fantastic option to consider for your early holiday manicures, perhaps even starting in late November.
To create the 3D knit effect, use a thicker gel polish or a mixture of gel and acrylic powder. Apply thin lines with a detail brush, building up the texture to mimic a knitted sweater. Cure each layer as you go. Alternate between a rich cherry red and a soft matte pink base. For an accent, consider subtle candy cane art on one nail. Remember that preparing your nails in early November for intricate designs like this allows plenty of time for practice and refinement before the main holiday rush.
27. Sparkly Pink Winter Snowflake And Gnome Nail Art
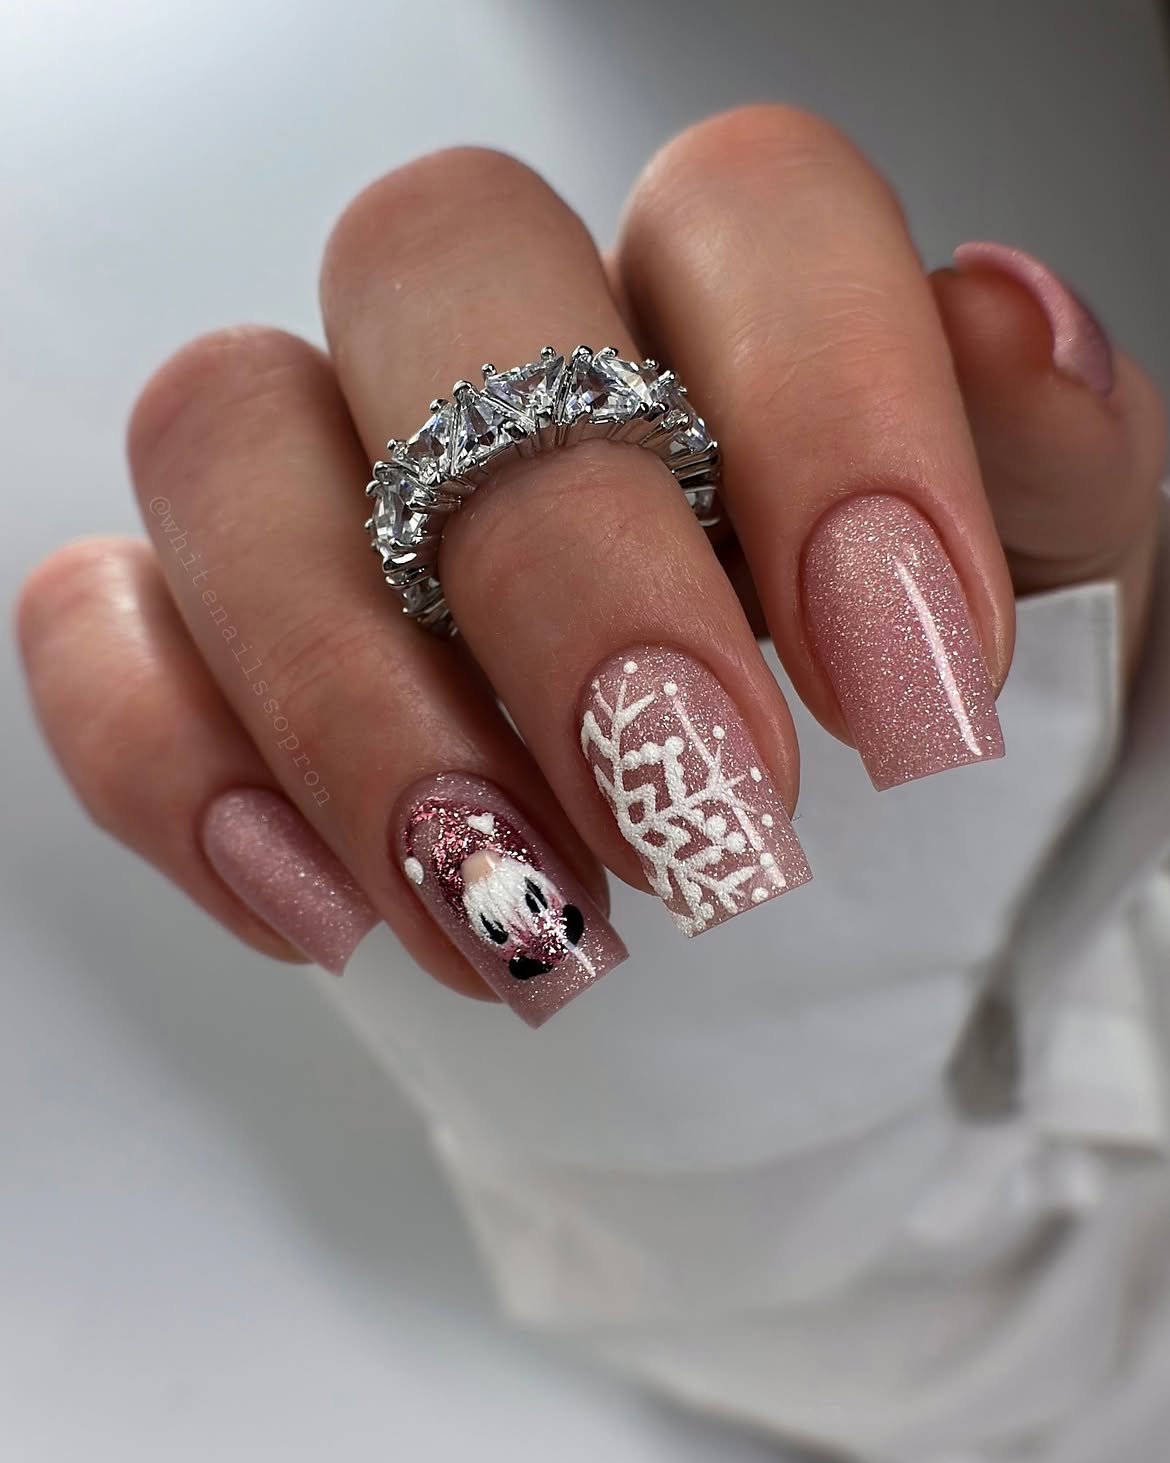
Bring a touch of whimsical charm to your December nails with this delightful blend of sparkly pink, delicate snowflakes, and adorable gnome accents. This playful design is perfect for those who love unique and charming holiday ideas that stand out from the crowd. The glossy finish enhances the sparkle, creating a festive yet lighthearted feel that’s incredibly endearing. It’s pure joy for your fingertips and fantastic inspo for your next nail art session.
Start with a shimmery pink base on squoval-shaped nails for a soft, flattering canvas. Use white or silver polish and a fine detail brush to carefully paint intricate snowflakes. For the gnome, simplify the design to their iconic hat and beard, adding a small nose for personality. Alternatively, a high-quality nail sticker can make creating the gnome much easier. Finish with a clear, glossy top coat to seal your art and maximize that eye-catching sparkle. This is one of the many creative ideas you can explore for the holiday season.
28. Snowy Pine Tree Almond French Nails
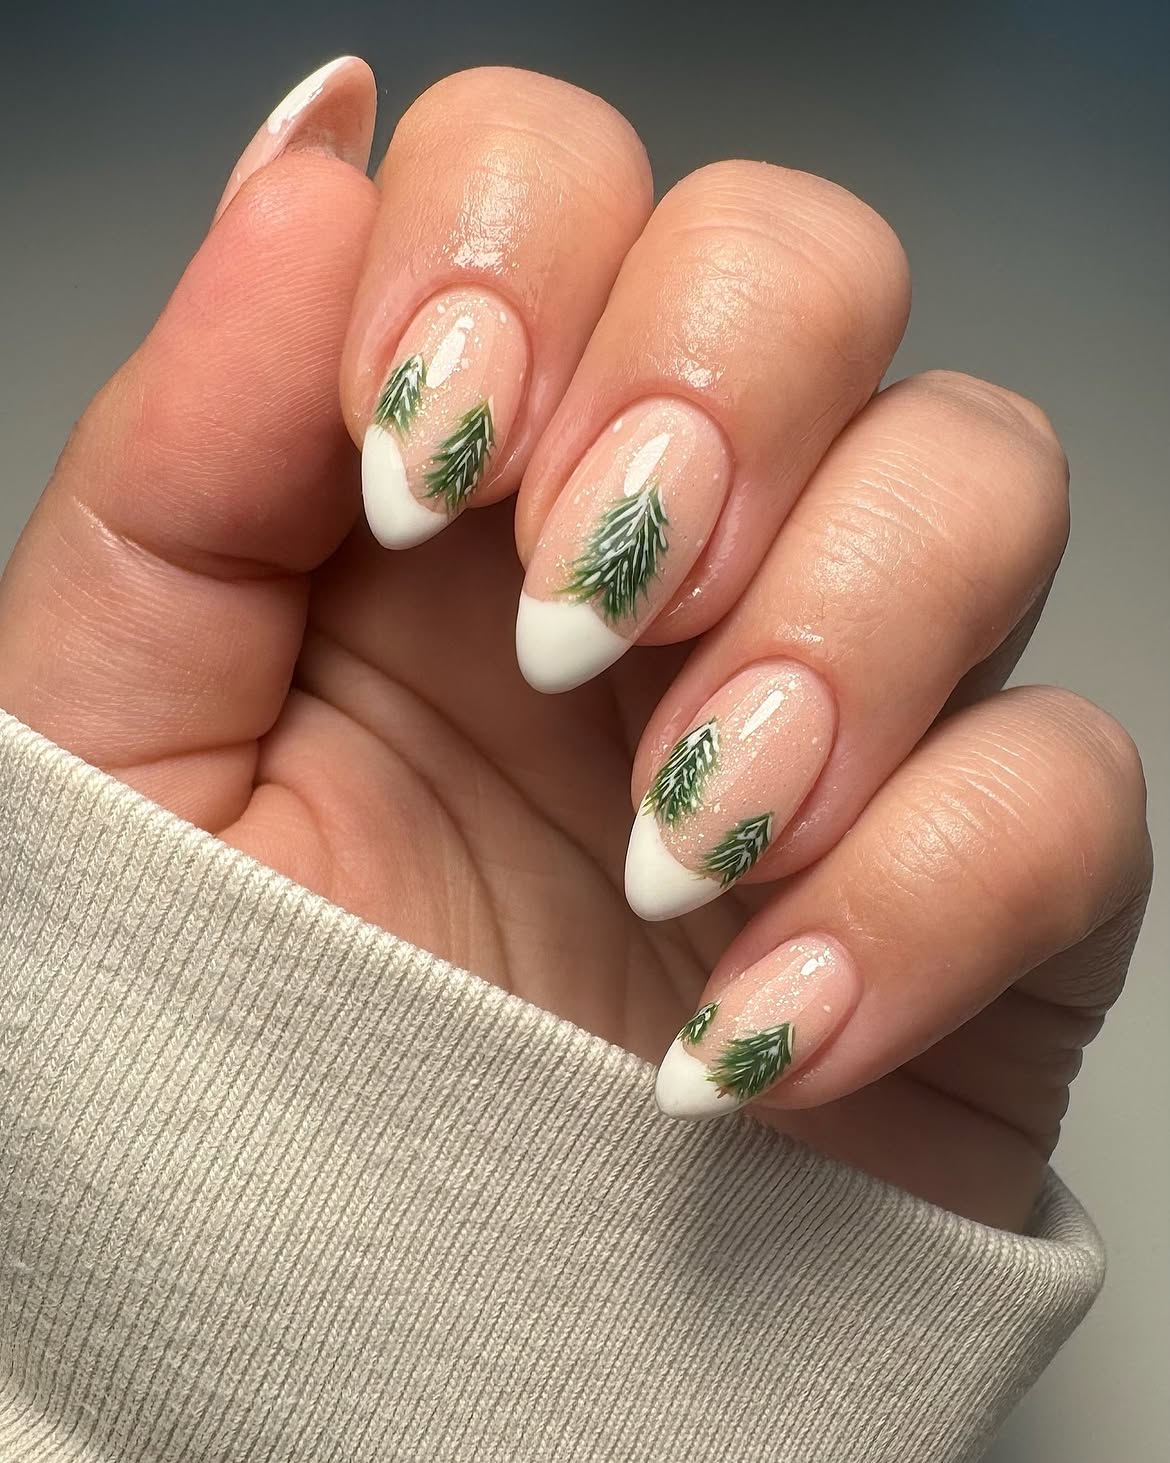
For a subtle yet undeniably festive look, these almond French nails adorned with snowy pine tree designs are a breath of fresh winter air. The delicate white tips are enhanced with a minimalist pine tree motif, set against a shimmering base for an elegant and sophisticated finish. This style captures the serene beauty of a winter forest without being overly elaborate, making it a perfect choice for those who prefer understated holiday glamour. For an equally refined but slightly different take, consider the classic French tips from Idea 2.
Begin by shaping your nails into a graceful almond silhouette. Apply a sheer, shimmery nude or very light pink polish as your base. For the French tips, use a crisp white polish, ensuring a clean, curved line. With a very fine nail art brush, paint tiny pine tree silhouettes in white or a very pale blue for a frosted effect, adding a few dots to mimic falling snow. This simple approach keeps the design chic and achievable for various skill levels.
29. Festive Matte Red Sweater Nail Art Coffin Nails
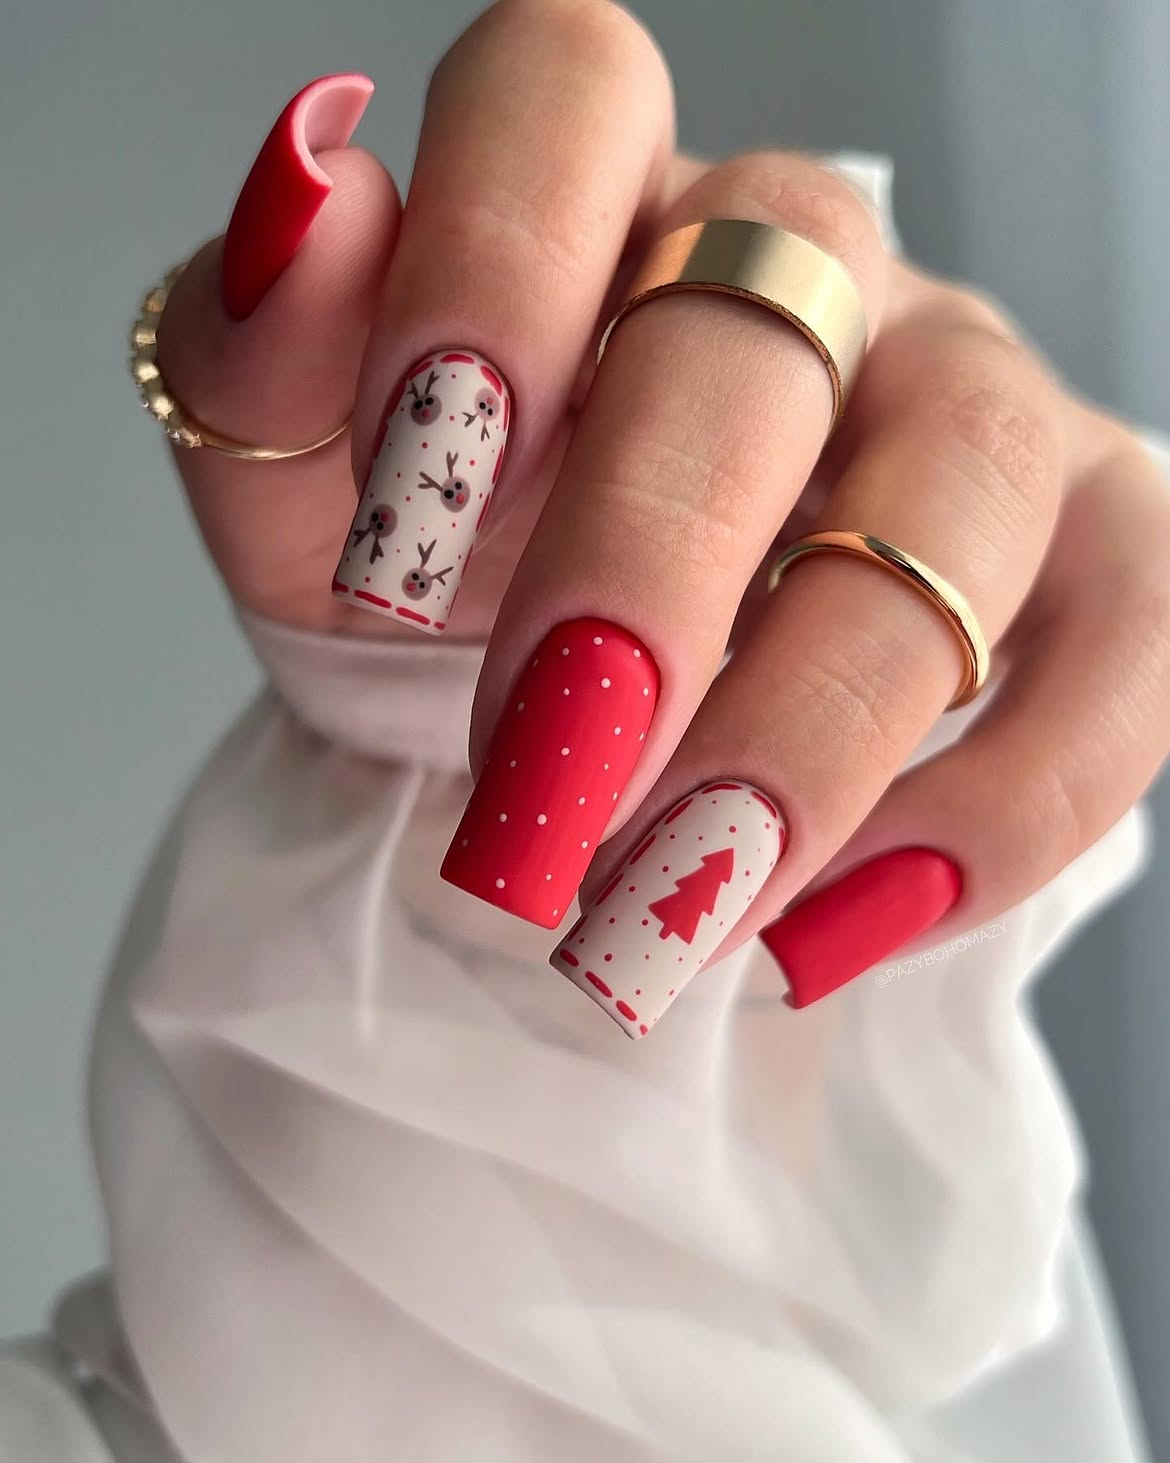
Channel ultimate cozy vibes with these festive matte red sweater nail art coffin nails, complete with charming reindeer accents. This design masterfully combines the warmth of a knit pattern with the sophisticated edge of a coffin shape and a velvety matte finish. It’s a stylish and inviting way to showcase your holiday spirit, offering a tactile experience that’s both chic and festive. If you loved the knit texture from Idea 6, this offers a bolder, more traditional color palette and an equally cozy feel.
Start with well-prepped coffin-shaped nails and apply a rich, matte red polish. For the sweater pattern, use a slightly thicker matte gel polish or a mixture to create raised lines and dots, mimicking a knitted texture; cure frequently. For the reindeer, use a fine detail brush with a contrasting color like white or gold. Even if you prefer short nails, you can adapt this design by focusing the sweater pattern on one or two accent nails. A tiny touch of dark green could also be incorporated as a subtle accent.
30. Glossy Pink Squoval Nails With Gold Christmas Tree Art
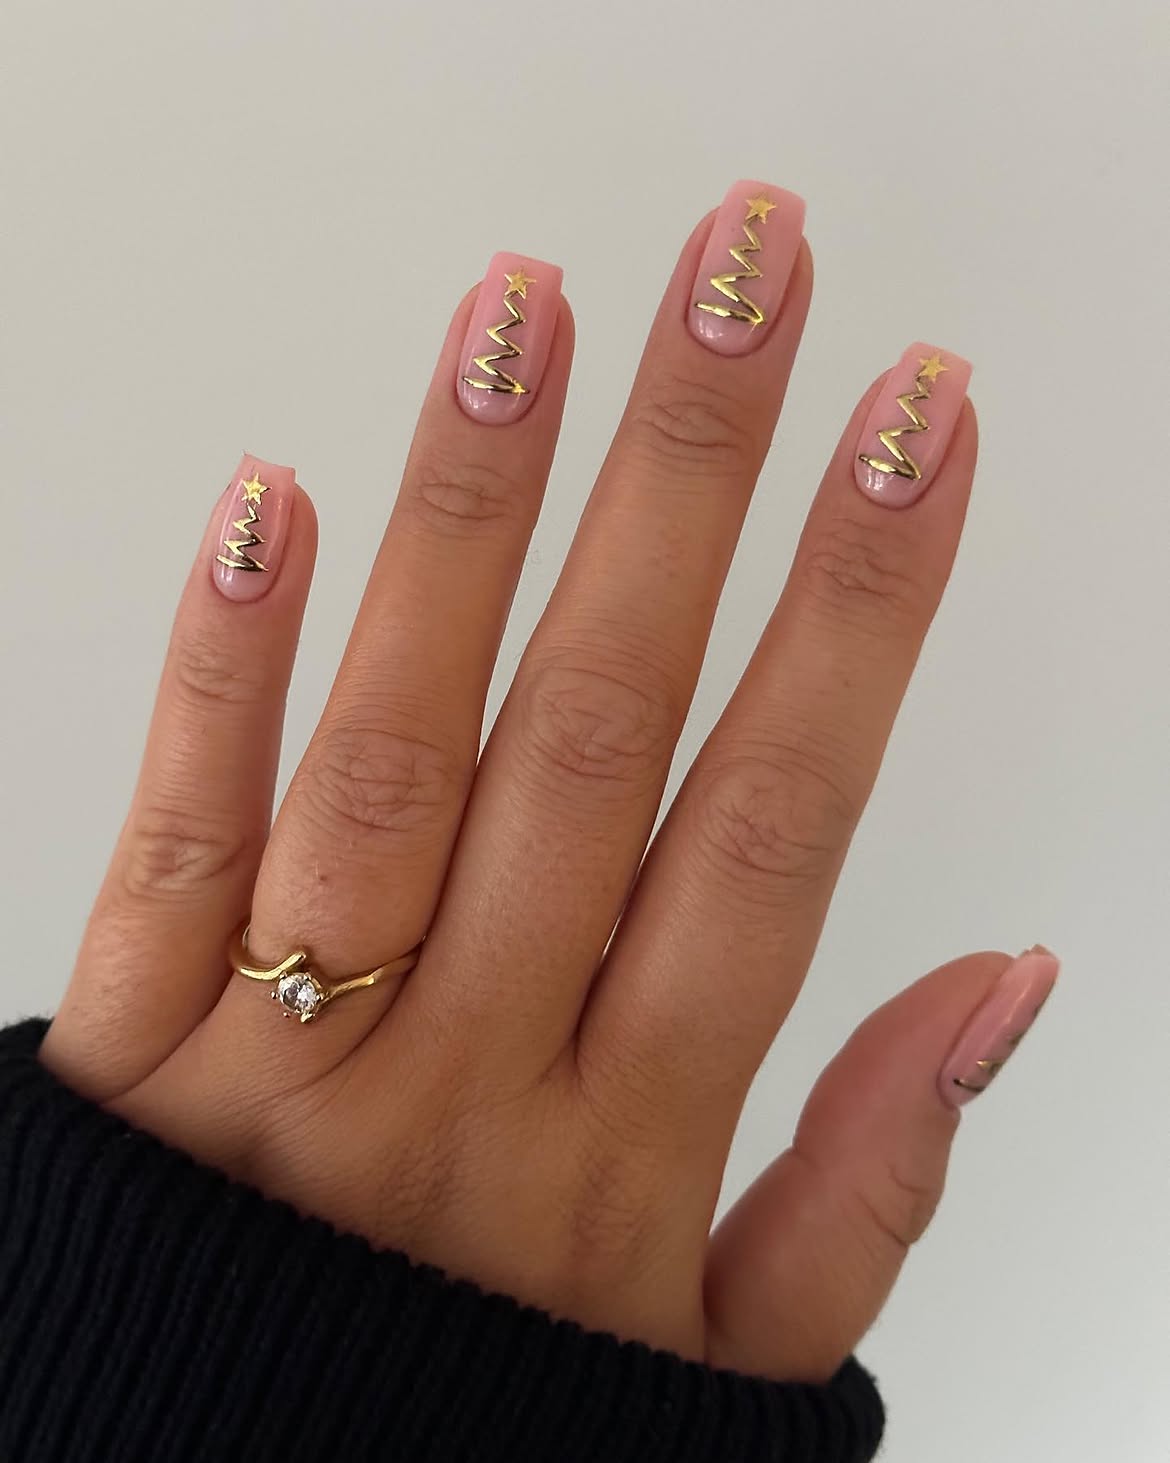
Elevate your December nails with this elegant and festive design, featuring a glossy pink squoval base adorned with exquisite gold Christmas tree art. This look offers a sophisticated yet playful take on holiday glamour, combining modern chic with classic holiday motifs. It’s a fresh and charming inspo for those who prefer softer colors over traditional reds and greens, proving that Christmas ideas can be both festive and fashionable.
After shaping your nails into a flattering squoval, apply two coats of a high-gloss pink polish. Once completely dry, use a fine detail brush and gold metallic polish to carefully paint abstract or geometric Christmas tree shapes on accent nails. For added dimension, you can use a 3D gel or small gold studs to create a textured tree. Finish with a durable, super-shiny top coat to protect your intricate designs and enhance the overall luxurious feel. This is one of those ideas that look complicated but can be adapted for any skill level.
Dazzle and Shine: Your December Nail Journey Begins!
There you have it—30 dazzling December nail ideas to inspire your festive season! From cozy sweater knits to shimmering snowflakes and classic holiday motifs, there’s a style for every celebration.
We hope these looks spark your creativity and encourage you to try something new. Don’t forget to save your favorite ideas to your Pinterest board and share your own holiday manicures with us!